At long last with the design decisions pretty well done
but still open to change as the bowls take shape the turning can begin. I decided to start with the medium size maple
bowl because if something goes badly wrong making another maple blank is pretty
easy. The process starts with finding
the center of the top of the blank. A
marking gauge is set to half the distance of the blank with lines drawn
parallel from all four sides. If the
gauge is set perfect then only two lines show up so the intersection gets
dimpled using a sharp punch and a mallet (red arrow). If it’s a little off there will be a gap with
a tiny box in the center and the center of that will be used. Once the center is marked a Fostner bit in
the drill press is used to drill a flat bottom hole for mounting on the lathe.
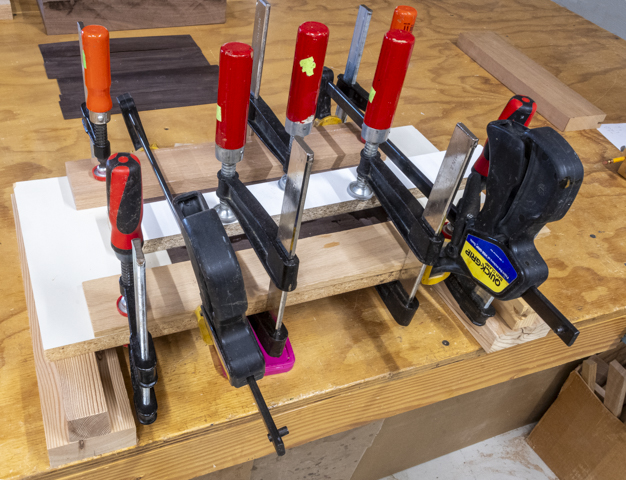
Mounting the blank in the lathe is next. That’s done by setting the just drilled hole
on the jaws of the 4-jaw chuck then expanding them holding the blank in place
in the top photo. If everything were
absolutely square and parallel with all the glued-up layers then I could mark
the center of the bottom face and use that to locate the live center. Because this blank consists of layers, I
want the joints to be 90 degrees to the center axis of the lathe so the glue
joints between the layers are parallel to the top and bottom of the finished
bowl. If the bowl’s mounting points are
out of alignment then the joint lines will run at an angle and visually that
would cause me a problem. To get it
right the tool rest is set so it’s close to one of the blanks corners, the red
circle shows that reference point in the top photo while the bottom photo is a
close view. The bowl blank is turned and
adjusted until all the corners are the same distance away centering that end
about the lathe’s axis. 
With the bowl blank squarely in place the tail stock is
brought up to the blank and the pointed live center pressed into the
blank. Out of curiosity I had marked the
center of the face and it was really close to where the live center point
actually hit. 
Using the center point I could layout an inscribed circle
within the square block and also mark where the edge of the bowl would end
up. As this is a medium size bowl its
finished diameter is 4 ¼” and the inscribed circle is 4 ½” so there is 1/8”
between the bandsaw line and the finished bowl diameter.
Next using the bandsaw I can cut a rough circle which
will make the first step of turning of the bowl to a constant diameter cylinder
a lot easier.
Mounting the bandsawn piece back in the lathe is
next. Because I am working off of two
known center points with the lathe the piece can be taken out of the lathe then
put back in with near perfect alignment time and time again. The first turning step is to get rid of all
the bandsawn roughness ending up with a smooth cylinder the same dimension from
one end to another. As the photo shows there
is still a little bit more turning needed to get the cylinder down to its final
diameter. The curly shavings and smooth
surface of the cylinder indicate the lathe tool is sharp and doing its job.
Here is a straight on view of the blank. The red arrows point to the joints between
the three pieces and the pencil lines indicate the top and bottom of the
finished bowl. Also, on the left you can
see the spigot on the 4-jaw chuck that goes into the drilled hole in the blank
that centers and holds the blank in place.
Once the blank is turned to a cylinder that is the bowl’s
top rim diameter layout can be done using the dimensions off the top
drawing. With three sizes of bowls there
is a drawing for each of the sizes. The
drawing shows where references lines are set measured from the top of the
bowl. At these points a notch is cut
just short of where the bowls face will end up.
For instance, the notch identified by the red arrow in the bottom photo
is 1 9/16” down from the top and if cut right to the bowls surface would be
11/16” deep. However, it’s actually cut
1/32” less at 21/32” so there is some room to smooth out the shape. One other bit of work has been done which is
to turn the sacrificial layer on the right side down to the diameter of the of
the bowl’s base. Both it and the top
diameter of the bowl will be used as reference points when doing the final to
size turning.
Using the slots as depth gauges the excess material is
cut away leaving a rough profile of the bowl.
This is refined using the template I made earlier to check the
profile. This is important since I want
matching sets of bowls. As I get close
to the final size the lathe is stopped frequently to check my progress. Unfortunately, there is no undo button on the
lathe and if too much gets cut away it’s a problem so it pays to be very
careful when doing the last little bit of work.
The maple bowls have three black decorative lines near
the top and one close to the bottom as shown in the rendering on the left. The right photo shows their approximate
layout with the red arrows showing the eventual top and bottom of the
bowl. However, before making the lines I
needed to turn the cherry bowl to verify their location. That’s because the feature bands in the
cherry blank are integral and as they are a part of the glue-up so can’t be
changed. The other feature bands are
applied after the exterior profile is turned and so their placement is a little
flexible.
The process to turn the cherry bowl is the same as the
maple one so I won’t go through that again.
Once turned the centerline of the banding in the cherry bowl is checked
against what had been laid out on the maple bowl. Good news is that they matched so I went
ahead and made the black lines.
Unfortunately, I was so concentrated on adding the lines in the correct
place that I forgot to document the process.
That’s not a problem as I will cover it when the small maple bowl is
made since the process is the same. The
photo below shows the profiles of the cherry bowl on the left and the maple
bowl on the right. Note that both of
them have excess material at the top and bottom that will be removed later.
Next Up – Turning Reference Stick & Making Black Feature Lines