Router Plane

Monday, March 28, 2022

Porch Swing/Glider - #3 Assembling Seat/Back Braces & Seat Slat Preparation

Assembling the seat and back braces is next.  All three of them follow the same procedure but the photo below is of the second one being done.   That’s because the first one is used as a jig to make sure all three are identical when finished.  This photo shows a dry fit with the two pieces clamped together and screws temporarily run in. 

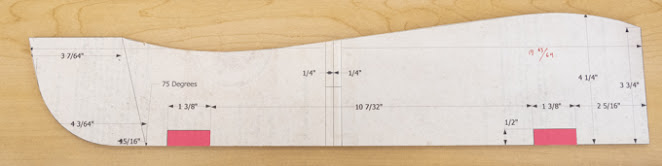
Here is a closer view of the joint.  At the bottom of the silver clamp is a wedge cut to the same 75-degree angle as the half lap joints.  This allows the clamp to have a flat surface to bear against at both ends.    There is a similar wedge for the red clamp.  After the dry fit the clamps and the screws are removed.  A Type III waterproof glue is spread on both halves of the joint then everything is reassembled.  The screws are really just there to provide clamping pressure until the glue cures. 

After the glue cures the screws are removed and 7/16” diameter holes are drill through the joint for dowels to be installed as joint reinforcement.  Because the screws left a hole bigger than the point on the brad point drill I am using to drill the holes a circle is drawn centered on the hole so the edges of the drill bit can be used to locate the hole.  The top photo shows the drill press setup and the bottom photo is a closer view that shows the edges of the drill lined up with the drawn circle.

I choose white oak as the dowel material since it is a hard wood and is resistant to moisture damage. They start with a 5/8” square blank mounted in the lathe that gets turned down to a ½” diameter.

The blank is then reversed in the chuck and the square end turned round.  That’s followed by turning the blank down to a hair over 7/16” in diameter using a 7/16” open-end wrench as a guide and a parting tool to make reference cuts as in the photo below. 

Using these reference diameters, the dowel is turned smooth with the last little bit carefully removed.  A sample hole drilled in a scrap is used to gauge when the fit is right.  Once the diameter is just right the dowel length is marked and it’s cut off with a fine-tooth coping saw.

To install the dowel waterproof glue is spread inside the hole and a little on the leading edge of the dowel, it’s then driven in with a mallet and left to dry. 

The next day tape is added next to the dowels to raise the cut just off the brace’s surface since I don’t want to scratch up the base material.  The saw is a Japanese pull saw that has no set to the teeth.  Here the right dowel has been cut off.

After peeling off the tape the dowel is just the thickness of the tape proud and that’s removed with a very sharp chisel as shown in the top photo.  The bottom photo shows after both dowels have been trimmed and the surface sanded to remove the smeared glue.  I am not worried about there still being some soaked in glue remaining since the piece will be painted rather than given a transparent finish.

Cutting off the extra-long parts of the half lap joint is next.  After using the template to draw the arc the bandsaw is used to cut close to the line.  The cut is brought down to the line using the disk sander followed by a little sanding with a ¼ sheet pad sander to smooth things out.  Since the pieces don’t have to match exactly like the inside faces of the braces where the seat slats go this method will work.  They still end up being really close but not perfect.

Here’s the three seat/back braces done, for now.  I may route a small radius on the back and bottom edges of the brace.  Work on the braces will stop while the slats are made.  They need to be mostly done before the exact spacing can be determined.  Also, there are several ways to attach the slats to the braces and that has not yet been decided.


Cutting the 17 slats for the seat is next.  They come from four different 2”x6”x10’ pieces.  For those that don’t know a 2x6 is really 1½” x 5¼”.  The plans call for the slats to be 1½” wide and 1” thick.  I am guessing that by the time I get done surfacing the boards they are going to be maybe 1/16” narrow.  There will also be some of the overall 5¼” width lost to straightening the edges but that should not be a problem.  A short explanation on how the slats get cut from the 2x6.  As noted above a 2x6 is really 1½” thick which is the final width of the slats.  So, when I start ripping 1” wide pieces off the 2x6 blanks that’s really the thickness of the slats.

It did take the better part of a day to do the following slat preparation work:

  1. Cross cut the 2x6’s in half
  2. Straighten and make parallel the long edges.
  3. Rip to blanks either two or three slats wide to work around knots and to make any cupping less pronounced prior to surfacing.
  4. Surface the blanks to final thickness which will be the final slat width when the blanks are ripped again.   The final thickness of the blanks or the final width of the slats ended up as 1 7/16”.
  5. Straighten the blanks that warped (about half) due to internal stresses being released when ripped.
  6. Since the blanks are oversize a final review of which edge to work from needed to be made when ripping to minimize flaws in the final slat.

The photo below shows all that done and ready for the next step which is to rip to final thickness but that will wait until tomorrow to see if there is going to be any more wood movement that has to be addressed.

Next Up – Making Slats & Slat Attachment Options

Monday, March 21, 2022

Porch Swing/Glider - #2 Shaping the Seat/Back Braces

The three seat/back braces are made from 2x6 material that starts by rough cutting them to length using the chop saw and a stop block on the left so they are all the same size.  Care is taken during the layout to work around knots or any other flaws.  Since the finished pieces are 4¼” and 3” wide so there is some room for adjustment.

Running the blanks through the planer is next to remove any cupping, clean up the rough construction lumber surface and bring them to the desired 1 3/8” final thickness.  All told only about 1/16” is removed from each face.  Here is the planer and vacuum setup.  The planer makes a LOT of chips so using the vacuum to collect them really helps keep the mess down.

From the planer the blanks are run through the table saw to clean up and make parallel edges plus giving me my working width.  Here’s the blanks along with the patterns ready to go.

Next is to cut the half lap joints used to join the seat and back braces together.  That involves cutting half way through the areas shown in red on the drawing below at a 75-degree angle to the straight base.

The miter fence is set to cut the 75-degree angle using an adjustable triangle from my drafting days.  A stacked dado blade will be used to make the cut but the fence angle is set with the regular saw blade in place since it gives me a bigger reference surface than the smaller dado blade.

This photo shows the cutting in progress.  The 5/8” wide stacked dado is in place along with a longer temporary fence and a stop block.

All of the parts got cut with no problems except one.  Here in the top photo, you can see after the dado had been cut a hidden crack was exposed.  Not at all what I wanted to see.  In some cases where the part is hidden or lightly stressed, I probably would not have been too concerned.  However, this is a critical joint where the seat and back come together so it’s a problem that had to be addressed.  My solution is to fill the crack with 2-part epoxy which is shown in the bottom photo.

There is one last little bit of work to do on the just cut dados.  They are not as smooth as I would like for a structural joint like these that get glued together.  You can see what I mean in the top board’s dado cut joint.   That can be easily resolved so the surface looks like the bottom board.  The fix is to use the dado blade to cut sideways removing the roughness. 

To do that the board is set so the high point of the blade is in line with the face of the cut as shown below.  The saw is turned on and the board is slid toward the stop block and back.  The board is advanced forward a little and another pass is made.  This process is repeated with the fence moving forward a little at a time until the whole joint has been surfaced smooth.

Once the epoxy in the cracked board had cured overnight the same process cleaned up the epoxy leaving a nice smooth surface ready for gluing.

With both halves of the half lap joint smoothed it’s time for a test fit and as shown here everything matches up.  The joints are tight on both sides and the angle is dead on.

Before the seat/back braces get assembled two dados need to be cut in the seat brace for the cross supports.  They are shown here on the pattern highlighted in red.

To get their exact width I need to cut two 2x4’s down to the rough length and straighten them since they both had a bit of a bow.  Last to get rid of a tiny cup plus clean up the faces by running them through the planer.  Actual process is to cut to rough length then using an 8’ level is used as a reference edge create a straight edge.  The new edge is then set against the level and the first edge cut straight.  The important thing to remember is to cut the crown of the bow first.  With that done they can be run through the planer until the faces are flat followed by measuring their thickness and using that for the dado width.  That ended up being about 1/32” over the 1 3/8” planned.

The dados are cut with a 5/8” wide stacked dado blade in three passes, here is the setup with the first cut made near the right end of the piece.  Clamped to the table saw rip fence is a stop block that controls the location of the cut.  The seat brace with a backer board prevents the dado blade from chipping the backside of the brace when it exits the cut are clamped to the saws miter fence.   In use a cut is made through each of the seat braces then the rip fence is adjusted to take another cut widening the dado to just under 1¼”.  The third and last cut is a bit of trial and error so the dado just fits the cross support.

Shaping the curved sections of the braces are next.  This is the top of the back brace after using the band saw to cut about 1/16” wide of the line.

To bring the cut down to the line and finish the curve a pattern cutting bit is used in the router table.  The key to making this work is a router bit that has a bearing at its top that follows the pattern cutting a finished surface that perfectly matches the pattern.  After the pattern is attached to the rough-cut back brace with double faced tape the brace’s bandsawn edge gets routed giving the surface shown.

Next Up – Assembling Seat/Back Braces & Seat Slat Preparation

Monday, March 14, 2022

Porch Swing/Glider - #1 Getting Started & Making Templates

Awhile back we added a covered porch on the south-ish side of the house.  It has proved to be a good investment as with some shade and a ceiling fan the patio has become much more usable.  We have a table and some chairs but I wanted to add a little more seating.  Reviewing the options, I remembered a swing/glider combination I had made in about 1986 that was comfortable and easy to swing, well at least part of the time it was easy to swing.  While building it during the winter, I didn’t fully take into account how the changes humidity would affect the tolerances in the swinging mechanism.  It worked great in the spring, fall and winter but not so well in the summer.  During the summer when things swelled up with the central Illinois humidity and while still comfortable it didn’t swing.  Here a photo taken in early 1987 with it on the front deck.

Pulling out the old plans I drew new ones up in SketchUp making some changes to the mechanism tolerances and beefing up some of the structural elements.  While here in the desert we don’t see anything near the humidity swings like in Illinois I wasn’t going to take any chances.  Below is a rendering of the project.  Not sure about the final color but there is a lot of blue and turquoise painted pieces here.

Once the rendering was done, I made the exploded diagram below to help work out assembly.

The exploded diagram is followed by the cutting plan below so I could get materials and deciding on that was more of an exercise than anticipated.

As this is going to be an outside piece my first choice of materials was Cypress but could not find any within a reasonable driving distance and I am really uncomfortable with ordering it in sight unseen.  Pressure treated material is another alternative but I passed on that for a couple of reasons.  First, it’s almost impossible to get it without a zillion knots or even remotely dry.  When it does dry the end result is almost always twisted, cupped and bowed.  Not my idea of the ideal material for this project.  After taking into account the piece will be under a roof and protected from the little rain, we get I decided to go with regular Douglas fir construction lumber.  What clinched the decision was the Maloof style rocker I built in 2015 out construction lumber that has been in a more exposed location under the front porch roof.  It looks as good now as it did when I set it out there more than six years ago plus everything is still straight and true.

With the material decision made it was off to the big box lumber yard to spend hours sorting through their material.  I took a long time to find boards that were straight grained, flat, true, mostly free of knots and didn’t have the pith running through it.  Most of the selected boards were either rift or quarter sawn but to paraphrase a fairy tale I had to kiss a lot of frogs to find the prince.  Once home the boards were checked with a moisture meter and most ran from 8% to 12% moisture.  This is too high so they were stacked with spacers to allow free air flow and left to dry.  I also wanted to see if they were going to stay flat and true or twist around like a pretzel.  That was seven months ago.  A few days ago, when I checked them the moisture content was down to less than 5% which is good and most of them were still in decent shape.  The key words here are “most” and “decent”.  Nearly all had a little cup which is easy to get rid of, a few had some minor curving or bow that when cut into shorter pieces I can straighten but a couple had multiple problems.  This photo shows the two that may not be salvageable as they are going every which way.  I did get a couple of extras just in case so think everything will work out.

The project begins by working on the swing itself.  The glider assembly is made completely separate and will come later.  The first part of the swing gets under way by making the three seat/back braces that most everything will attach to.  They are shown in blue here and each are made from two pieces joined with a half lap joint.

Since I had already drawn the project out the parts that make up the braces could be printed out full size and used as a pattern.  Because the parts are bigger than an 8 ½ x 11” sheet of paper they get printed out on two sheets with reference marks for alignment.  In the photo below the left sheet has been cut along the base reference line.

In this photo the two sheets are aligned to a straight edge and the center reference lines are correctly spaced out.  The C clamps are just for weight to hold the sheets in place while they get taped together.

Once taped together they are taped to a scrap piece of ¼” plywood with masking tape as shown in the top photo.  The next step is using the masking tape as a hinge a fine coat of adhesive is sprayed on both the paper and plywood.  The paper is then flipped back into place as shown in the bottom photo.

Here in the bench vice buried between the wood planks wrapped in plastic to keep them from sticking together are the two patterns.  I will leave them overnight for the glue to bond.

Next the right sides get trimmed to the pattern line as does the bottom and any other straight lines.  That’s been done in the top photo.  After that a jig saw with a fine blade is used to cut the curves a little oversize.

A 12” disk sander is used to smooth the edges and outside curves bringing them down to the pattern line while the oscillating drum sander takes care of the inside curves.  Final blending of the transitions is done by hand sanding.

Here are the two patterns ready to go.

Next Up – Shaping the Seat/Back Braces

Monday, March 7, 2022

Wood Egg - #2 Completing the Turning, Finishing & a Problem

In this photo the turning has started and the right end of the blank has been brought down close to its finished size.  There is just a little more to be removed so the shadow line matches up with the pattern.  All of the turning here has been done with a fingernail ground spindle gouge shown in the bottom photo.

Here the bulk of the turning is done with just the ends holding the egg in the lathe to do.  At this point the tail stock gets pulled back out of the way so that the end can be turned to its final size and sanded smooth.

The top photo shows after the tailstock had been pulled back so the little nub/cone could be removed and after that nearly all the finish sanding done.  The bottom photo has the tailstock brought back up against the egg but with a folded-up paper towel added to provide a pad so the sanded end does not get scratched or damaged.  The tailstock is there to provide a little support while the left end of the egg gets turned.

Once the shadow from the wood egg lines up with the pattern on the shadow board the turning is complete except for a little bit on the end.  Rather than try to turn the egg off and risking a chance of it hitting the lathe or floor it gets cut free using a fine-toothed Japanese pull saw.  What little is left on the end is hand sanded to blend in.

The actual turning of the egg went pretty quick, probably around 45 minutes or so.  I am sure if I made a bunch of them it would get a lot less.  Since everything was set up I decided to make two more eggs.  In addition to the already completed cherry egg one of them will be from a highly figured piece of black walnut and the other will be from oak.  Here are the three completed eggs ready for finishing.  The cherry in the center is the first one.  The walnut egg on the left ended up just a tiny bit smaller as the blank wasn’t quite big enough in diameter to match it to the center cherry one.  The one on the right is out of oak.  Since that blank was larger it could be bigger – how about calling it a goose egg.  To revise the original pattern I just added a line about 1/8” larger than the original layout line and turned to it.

Normally my finish of choice is lacquer but here that’s a problem because there is no good way to support the piece while the finish dries.  The balls that I have made have a friction wax finish applied but that only works because the balls have a consistent diameter.  That allows me to rotate them in  the lathe about each of the X, Y and Z axis in a fixture to seamlessly blend the finish together.  This is not the case with an egg so I went with a three coat Danish Oil Finish. 

After the first coat the walnut and cherry eggs looked great but the oak egg’s proportions looked wrong.  At first, I couldn’t figure out why.  I doubled checked it against the pattern profile and it matched up just right.  For a day or so I couldn’t find a reason on why but then it dawned on me.  Because an egg is longer than it is wide or pretty much an elliptical shape adding a fixed amount to the perimeter distorts the length to diameter ratio making it look not quite right.  The fix is to change the current length to diameter ratio so it matches the original egg’s ratio.  I could do that by putting it back in the lathe and eyeball turning until it looks right or doing some math and laying out a new pattern based on the original egg’s ratio.  Since I already know from experience what happens when I try to turn the shape by eye the mathematical method seemed to be the way to go.  That change was not a lot, only about 1/16” needed to be taken off the radius or 1/8” off the total diameter at the widest point.  From there it's tapered toward the ends to blend in.  To see if my math was correct, I laid out the new pattern on the shadow board then put the egg back in the lathe and turned it down to that line.  After some hand sanding to blend things together it ended up looking like the other two eggs.  Here are all three eggs with the completed Danish Oil Finish.

I have to say there is not really any functional use in these turnings but it was a fun little project the does not take much material and I had plenty of available scraps to use.  Who knows if I get bored in the future I might try and turn more?  Maybe even an ostrich egg.