Router Plane

Monday, January 30, 2017

Dining/Game Table - #23 Resolving Stain Problem & Starting the Finishing

After thinking about how to fix the unstained pores I had an idea and decided to do some testing.  
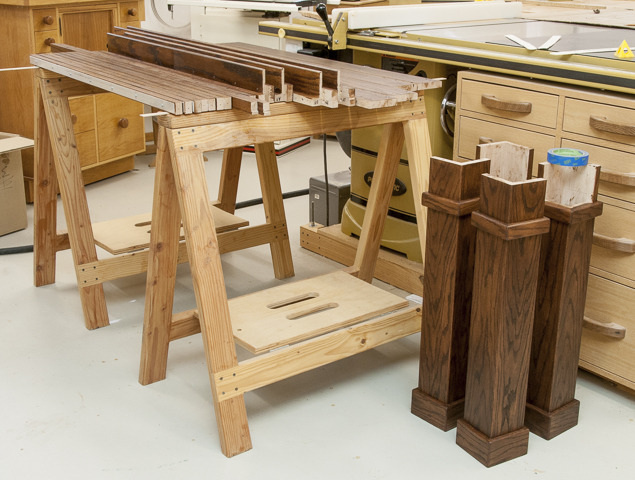
For my test material, I decided to use the Alignment Guides.  They are wide enough to give me a good sample and if things don’t work out quite right they are under the table and hidden from view behind the Outer Rail.  Here I am ready to start staining.  I will pour out some of the stain from the glass jar into the smaller plastic container.  That way when, not if, I eventually knock things over I will lose only a small amount of stain not the whole mixed lot.
Staining Setup & Materials

First, I stained the Alignment Guide assembly and when I examined it sure enough just like my large sample there were unstained pores here too.  
Unstained Pores

Before I go further I want to touch on the stain itself.  I have been using stain to indicate the finished mix of dyes and alcohol but that’s not really right.  A stain is an opaque pigment that for the most part remains on the surface of the wood and in it’s pores.  A dye on the other hand is a translucent material that penetrates deep into the wood and provides color from within.  I like to use dye because it is translucent and does not mask the character, figure or chatoyance of the grain.  Also, in this case I had several colors of concentrated dye and could easily custom mix the color I needed.

For the test, I am going to take advantage of a gel stain’s property of packing into the wood’s pores.  Here’s the sequence I used and observations:
  1. On the left half I rubbed a dark walnut gel stain that has the consistency of pudding into the pores and wiped as much off it as I can.  It filled the pores but also slightly darkened the entire treated half.
  2. I then gave the whole piece it’s first coat of lacquer, let it cure then lightly wet sanded with a 1,500-grit pad to remove any dust nibs.   The left half looked quite good while the right half still had the unstained pores.
  3. On the right half that had just the dye mix and lacquer I rubbed the dark walnut gel stain into the pores and wiped off the rest.  Because the one coat of lacquer had sealed the non-porous surface but not filled the pores the only area impacted by gel stain was the pores.
  4. A second coat of lacquer was sprayed on the whole piece.

The next day I gave the second coat of lacquer a light wet sanding using a 4,000 grit pad.  Going in I thought the stain (dye), lacquer, gel stain and lacquer would give the best results.  To my surprise, it did not.  The best was the left test; stain (dye), gel stain and lacquer.  The result is a richer slightly deeper color even better than what we had decided on using.  A silver lining to a problem.
Left, Dye/Gel Stain/Lacquer - Right, Dye/lacquer/Gel Stain/Lacquer

With the stain mix and finish application for the body of the piece settled (color of applique pieces are still under discussion) I could start the finishing process for real. 

The lacquer spray mix is a combination of satin lacquer, lacquer thinner and a small amount of retarder.  I mix it in a quart plastic container then pour into the 8 ounce cup used on the spray gun. 

Lacquer Materials
I decided to start the finishing by spraying 2 coats of lacquer on the MDF.  It will be hidden under the pad but because if MDF gets wet is swells up and loses structural integrity I wanted to provide some protection in case of a major spill.   It will also give me a chance to refresh my spraying skills before I start on the oak itself.  No stain is needed and I use the HVLP spray system for the application.  Setup is simple, the HVLP turbine goes in the shop plugged into the radio controlled on-off switch for the dust collector.  The 1” air supply hose gets run outside to the spray stand that consists of two sawhorses and a set of pyramid risers.  That’s it, once pieces are sprayed they are brought into the shop and set on blocks to dry.
Spraying Lacquer

Once sprayed and cured overnight the MDF is lightly sanded with 220 grit sandpaper to knock down any roughness due to dust.  I don’t want a really smooth surface but one with a little tooth to help hold the pad in place.  The oak will follow a bit different process because I want a really, really smooth surface. 
MDF Sealed with Lacquer

I started the actual finishing by completing the stain work on the alignment pieces then dyed and stained the oak sub-structure for the MDF.  Most of the individual components are not very wide which does not lend them to the HVLP sprayer.  Also, the weather has not cooperated much forcing me to spray in the shop.  Those two considerations have meant a number of the pieces have been sprayed using the air-brush.  It is quite a bit slower but gives the same quality and is more in tune with the constraints noted above.  I gave them two coats of lacquer wet sanding between coats with a 2,100-grit pad and with an 8,000 grit pad at the end.  This completes the hidden pieces so from now on I will be working on the visible pieces.  I know if you are on your back on the floor under the table you can see the sub-structure parts but most of the time they will be out of sight.

The legs went fine as did three of the four Outer Rails.  When I applied the dye to the last piece I noticed a series of vertical lines (scallops).  They are caused by tiny hills and valleys on the face.  My guess is they were a result of sympathetic vibrations when I ran that piece through the thickness sander.  Because they are so small I did not see them when doing the final sanding and preparation for staining.  Unfortunately, the only way to fix the problem is by sanding the piece flat then re-staining.  Leaving them is not a good option because when I spray the piece with lacquer they will just get more pronounced.  After sanding and re-dying it looked just fine.
Sanding Scallops

Here is an in progress shot with a bunch of different pieces dyed and stained.
Dying & Gel Stain Pieces in Progress


Next Up – More Finishing plus Applique Size Problem, Masking, Stain Color & Installation

Monday, January 23, 2017

Dining/Game Table - #22 Fitting & Punching the Pad, Scaling up & Testing Stain

With the pad finally in hand I could start working with it.  It came as a 51” X 83” sheet of which I needed about 44” X 55”.  Unfortunately, it came with only one fairly straight edge and was not square.  I was hoping for 2 good edges and at least one square corner but nope, not the case.  Before I started cutting the pad I checked on-line to see what the suggested cutting method was.  Only real information I found was on the use of an 100 watt industrial carbon dioxide laser.  That might be just a little overkill for me so I tried scissors and they worked just fine.  I started by straightening the best long edge then squaring the sheet and cutting it a couple of inches oversize.  To get a straight edge I used my 8’ level, marked it with a white pencil then cut with a pair of scissors. 
Marking a Straight Edge

It took some time to fit the playing surface/pad to the MDF base.  Not because it was particularly complex but because I was being very careful and double checking my measurements.  I had only one chance to get it right and if I cut it too small there is no patching you just start over with a new $100 blank.

Here is the pad cut to size sitting on the MDF base.  I left a small tab on one corner so I could tell which face was up and as a reference mark to set in a specific corner.  The pad is a little bumpy around the edges as the adjustment screws are holding it up.  It will lay flat after I punch a bunch of holes for them.
Pad Cut to Size

There are 66 holes to punch and I needed them pretty accurately located for the pad to lay flat.  My first attempt was to use a thin piece of wood with holes drilled at the center point then marking them out with a white pen.  All that got me was a blob of White-Out on the pad.

White-Out Marking Test
Second attempt was to drill a hole the size of the punched hole in a thin piece of wood, locate it in place, set the punch in the hole and whack it with a hammer.  Because the punch is taper ground and I could not compress the pad much all that got me was a split piece of wood.  A larger hole would have prevented the wood from splitting but would not give me the accuracy I wanted.

Punching Through Wood Template
Third time was the charm.  I substituted a scrap piece of mat board for the wood then used the punch to make the hole.  Using that as an accurate template I put it on a test piece, set the punch in the hole and gave it a good whack with the hammer.  Result was a nice clean hole in the pad and a conical hole in the mat board that acted to center the punch in the right place.   For production, only change is to add a thin oak backer to prevent me from punching a shallow hole in the MDF.  Here is the oak backer, template, pad and structural sub-base.
Setup for Punching Holes

Here everything is ready to go.  The oak backer is under the pad, the template is aligned with the edge of the pad and centered on the hole in the MDF.  I know it looks shifted a little to the left but that’s because the photo is taken a little off-center.
Ready to Punch Holes

All I had to do was set the punch in the template guide hold firmly in place and whack it with the hammer.  Result is three clean aligned holes.  Only 63 more to go.

3 Holes Done 63 to Go

With all the holes punched I could move the pad into place.  Here is what it looks like close up.  The screw heads are slightly below the pad surface per the testing done in Post 12.  The center hole is for the long #8 X 2½” screws I installed in Post 13 to lock the structural support, MDF and inner rail together. 

Pad Set In-Place Over Screws
Stepping back the pad is now under just a little tension and pulled nice and flat.  The pad can now be taken off and put away in a safe place until it’s ready for final installation.
Pad Competed & In-Place

I can now do the final bit of disassembly.  The MDF comes first after I remove the 100 screws holding it on.  Last to come apart is the sub-structure that supports the MDF.   There is only one bit of wood work left.  Back in Post 13 I found that the first couple of long #8 X 2½” screws did not bite into the inner rail as much as I thought they should so I counter sunk a couple of them another 3/8” into the structural support which helped tighten things up.  To make sure I did not forget to drill the rest I stuck this note next to the ones I had re-drilled.  
Note so I Don't Forget

After drilling the remaining holes I was finished with all the wood working.  Here are all the parts and pieces that go into the table except for the pad.
One Game Table Some Assembly Required

When I was doing all the initial testing to get a stain color I was doing it in tablespoon batches.  This was fine for tests but not practical for doing the whole table.  I am going to scale it up to a cup or 16 times the original mix.   Here is chart of how that plays out.

Process I use is to gather all the materials and sit at the bench to measure out them out.  The photo below is my setup.  For a solvent I can use either water or denatured alcohol.  I use alcohol since it won’t raise the grain when applied.  The glass measuring cup next to the can of alcohol is used to measure the alcohol.  I use that to rinse out the dye measured in the small plastic cup in the center of the photo into the larger mix jar in the center with a blue lid.  At this point I have all the dyes in the mix jar except for the red.

Stain Mixing

Sometimes scaling up a mix is not always linear so after I finished the mix I made a test piece complete with a couple coats of finish to compare against the original.  It is a really good match perhaps just a slight bit darker but then that may be due to the piece of oak it went on. 
Scaled-up Stain Sample & Original Test Pieces

I did one last test using a large cutoff from the table top itself and at first glance it looked great. 
Stain Test on Table Top Scrap

However, when I looked closer I could see that some of the pores in the oak were not stained.  They are the elliptical areas that are a lighter color.  The lighter color is where the three coats of lacquer had mostly filled the pores.  My guess is they are so narrow that the surface tension in the stain mix keeps them from being stained.  This is not usually a problem because I don’t normally apply a stain this dark and any pores that have no stain blend in.  For reference the lines at the bottom of the photo are my ruler and are 1/16” apart.
Problem with Stain & Pores

I looks like I still have some work to do before I can really start on the actual finish work.  While thinking about how to proceed I will do a major clean-up in the shop dusting and vacuuming as much as reasonably possible to keep dust out of the finish.


Next Up – Resolving Stain Problem & Starting the Finishing

Monday, January 16, 2017

Dining/Game Table - #21 Final Sanding, Dent Removal & Divot Repair

Ah yes, sanding one of those necessary evils of woodworking besides I am waiting for the playing surface/pad to be delivered.  Sanding needs to be done well or the final finish will suffer.  As I went along with the build I did rough sanding up through 120 grit so it’s not like I am starting from scratch. 

For this project, I finish sand in reverse order of the build, so first up is the top.   Because the table is made out of Red Oak, an open grain wood that does not show scratches easily, my final sanding grit is 220.  If I had used cherry, maple or some other fine grained wood I would have had to gone to a finer grit to remove all visible scratches.  Procedure is using a pad sander go over all the edges first then the faces and lastly hit the round overs by hand making sure the flat surfaces flow smoothly into the round over.  I also check for any dings that may have happened during the build.  Sure, enough on the underneath side of the first leaf I found some dents. 

Small Dents in Top
Sanding the dents out is not the best way to go as that will leave a depression in the wood.  For dents where no wood is cut or removed a better way is to use steam.  A small dent is just where the wood fibers have been crushed.  Steaming using an iron and a wet cloth re-inflates the crushed fibers and the dent disappears.  Here the dents are gone but the steam also raised the grain around them.

Sanding the area briefly with the pad sander cleans things up and no more dents.

I continued to take the table apart and finish sand until I got to the Inner Rail/Alignment Guide assembly.  In post #13 Fitting Alignment Guides & Building Miter Jig for Top Arm Rail I said that when I was satisfied with the fit I would glue them together.  Well, that’s now and it’s pretty easy take out the screws holding the two pieces together, run a bead of glue, put the two pieces back together using the screws I just took out.  I did have some glue squeeze out but let it set until rubbery then cut it out with a sharp chisel.
Gluing up Inner Rail Assembly

The next assembly to come out was the MDF playing surface support and it’s supporting sub-structure.  I moved it to the workbench so when the playing surface/pad arrives I could fit it and punch all 66 required holes.
MDF Playing Surface Support

Outer  Rail Round Overs
While waiting for the pad I moved on to taking the outer rail and the legs apart.  When I originally assembled the outer rails and the legs I had not rounded the lower edge of the outer rail as I wanted that sharp edge for reference.  Since I no longer needed it for that purpose I could route the round over softening that edge.  Several posts back while working on my back under the table screwing the arm rail on I banged my head on that sharp edge not once but twice and bled all over it.  Just the tables not so subtle way of reminding me not to forget that I still had some work to do there.  The actual routing was easy.  I had one router set up with the 3/16” bit for the outside and another one set up with a 1/8” bit for the inside. 

While I was doing the finish sanding on the arm rails I came across what looked like a minor imperfection on the inside.  Checking it out I found that there was a void and by the time I got all the loose bits cleaned up I had a nice divot.  Not really what I wanted to see.
Cleaned up Cavity on Inside Face of Arm Rail

I could have filled it with wood filler but decided that even though it is on the back side of the rail and hidden I would patch it.  First I changed the bit in the router to a 3/8” straight flat bottom bit and added a fence to guide the router parallel to the edge of the arm rail.  I adjusted the guide so the bit was centered on the divot and made a pass going from one end of it to the other.

Router Set-up for Cavity Clean-up
A second pass just a little deeper gave me a flat bottom and parallel sides for the patch.

Routing Done for Patch
A little work with the wood chisel gives me a nice square hole for the plug.  Using a scrap slightly thicker than the hole I made a plug and was ready to glue it in place.
Plug Ready to be Glued

I put a small amount of glue in the hole, pressed the plug in place, securely clamped it there and left it to cure overnight.  The next day using a scraper I leveled the plug with the rest of the rail, gave it a quick sanding and was done.  If it was at all visible I would have paid more attention to matching the grain.
Completed Patch

This left just the legs and they were nearly done earlier.  A check of them revealed only minimal work to be done.  This completes all the final sanding except for a little bit on the MDF playing surface support and it’s supporting sub-structure that I will not do until after I have fitted the playing surface/pad.   Here is the stack of all the finished sanded parts ready to be stained.  Not that big a pile considering all the work that has gone into the project and good news, it looks like it will fit in the car trunk.
Sanded Table Pieces Ready for Finishing

The same day I completed my finish sanding the playing surface/pad showed up on the doorstep so that will be the next bit of work. 


Next Up – Fitting & Punching the Pad, Scaling up & Testing Stain

Monday, January 9, 2017

Dining/Game Table - #20 Top Brass Pins, Leaf Seal & Applique Pieces

Well, at the end of the last post I mentioned that a final decision had been made on the playing surface/pad color and it had been ordered.  I spoke too soon, after a week we checked and found that the color that had been ordered had been discontinued and nobody at the company thought to mention that when the order was placed.  To add insult to injury the second color choice was also discontinued.  After getting an updated color listing the decisions was made to go with black and the pad ordered again.

For some time, we have been discussing how to lock the table top in place.  At last we decided to use a pair of removable brass pins.
Drawing  Showing Brass Pin Location

After some careful measuring, I located the holes in the arm rail.  The tape makes the center lines easy to see and can help reduce any chip out around the hole.  Typically, I would drill the holes using the drill press to make sure they are square.  However, the arm rails are screwed down and I am not going to go through the process to remove them.  I marked the drill bit with tape to set depth and with me keeping one axis square and my wife as a second set of eyes guiding me we got them done.

Drilled Hole in Arm Rail for Brass Pin

With one hole on either side I was ready to mark the locations on the top.  As careful as I am about my measuring I doubted I could get the holes perfectly located so the top would just drop onto the pins.  The solution is a dowel center.  They come in various sizes and all I had to do was pick the ¼” one drop it in the hole then set the top in place and tap it to mark the center of the holes.  If you look just to the right and down a bit from the hole there is a fine vertical line and a cross mark.  Those correspond to the face and a reference mark on the top.  This along with one on the other side lets me make sure the top is where it needs to be.
Dowel Center for Marking Brass Pin Location in Top

Making the brass pins is next.  I am using ¼” brass rod for them.  Each pin goes 5/8” into the arm rail and 7/8” into the top for a 1½” pin.  After cutting a 1½” piece I rounded the ends with a file then using finer and finer grits of sandpaper finishing it off with steel wool polished them to a semi-glossy sheen.  Putting a ¼” pin in a ¼” hole will work but it’s a snug fit, too snug really.  To provide just a little clearance I reamed the holes out by 1/64”.  When I set the top in place it dropped in just fine.
Steps in Making Brass Pins

In a normal table I would be done with the top but adding the game playing function below it added some new considerations.  Imagine you have an expensive game set up and the play is continued over a couple of weekends.  Through the week, the top is in place and used a dining table.  During a meal, somebody knocks over a glass of water which runs across the table into the joints and down onto the game making a mess out of everything.  One way to avoid this is to have a one-piece top with no joints.  This is OK except the top would weigh over a hundred pounds.  Since the top has four leaves and three joints I needed a way to reduce the chance of the above scenario.  My solution is to fasten a strip of oak to one leaf below the table and have weather-stripping sealing the joint against its mate.  Below is my test assembly, the weather-stripping shown is hollow and will be under slight compression for a seal.

Mock-up for Leaf Joint Seal

The oak strip is pretty simple to make.  I cut to width, run through thickness sander to get rid of planer marks and cut the notch on the table saw.  I could have set up the dado blade to make the cut but thought it would take less time to just run it through the saw a few times.  That did leave me with a series of small ridges at the bottom of the notch.  A couple of passes with a shoulder plane flattened the bottom and cut a sharp corner where the bottom and side of the notch meet. 
Shoulder Plane & Finished Dado for Weather-Stripping

I finish up by cutting them to length, rounding over all the exposed edges, sanding smooth and drilling the mounting holes.  Note the second from right staggered holes.  This is so the pieces only go on one way.


Last is to screw the strips on.  I will not be installing the weather-stripping until after the finish is applied.  Here is a leaf in place. 


Next is the applique pieces that go on the legs and outside rail.  These roughed out pieces have been setting since post #7.  In checking them they are in pretty good shape.  No twist or cup only a couple had some minor bowing but they are so thin it will be easy to flatten them when they are applied.
Applique Pieces

Since they are already the finished thickness all I had to do was check the drawings for size then rip to width and cut to length.  The more time intensive part was putting a round over on all the edges.  When I drew the plan a 1/8” radius was shown.  After I did the first piece it just didn’t look right, the round over was just too small to read very well.  The pieces are ¼” thick so I could try a 3/16” radius.  In a side by side comparison the 3/16” looked a lot better so that’s what I used. 

I started with the small pieces at the top of the leg.  They are only 1 7/8” x 1 5/8” and because they are small my fingers end up way too close to the bit.  To get them away from that bit spinning at 15,000 RPM’s and provide a margin of safety I used the pieces in the setup below.  The big yellow thing is the gripper, it has a rubberized base to hold on to the piece being routed.  The small piece of wood just to it’s right is a spacer to hold the gripper parallel with the applique blank which is just to the right of the red router bit.  The MDF board on the far right keeps the blank square and is what I use to push the blank while it is being routed.

Parts Used to Safely Rout Small Pieces

Here is what it looks like when I am ready to route.  The bit is covered and my fingers are a few inches away from it which makes me a lot more comfortable. 

There are 28 individual applique pieces that need routing and when done here they are stacked up ready for finish sanding.

Applique Pieces

To see what the applique pieces actually looked like I taped them on where they would go on a corner and am happy with the result.

This finishes up the bulk of the woodworking.  I still have lots to do like; finish sanding, staining, spraying several coats of the lacquer finish, buffing it out and applying the applique pieces.  Then there is the fitting of the playing surface/pad if it ever arrives, packing everything in the car for delivery and lastly setting it up.


Next Up – Final Sanding, Dent Removal & Divot Repair

Monday, January 2, 2017

Dining/Game Table - #19 Drilling Peg Holes & Routing Top Edges

After turning the pegs I moved on to the holes in the leaves.  The story stick I used to mark out the locations for the biscuits in the leaves also worked for laying out the pegs.  In order to make it simple to keep track of which leaf goes where the second peg from one end is at a different location in each set of joints.  One matches the biscuit layout, one is 2” to the left and one is 2” to the right.  The green tape in the photo is offset 2” to the right.

Story Stick for Peg Layout

Here is a closer look at the first peg location.  The pencil mark down on the top goes across both leaves.  The joint is about a third of the way down the lower pencil line.

Closeup of Peg Location Marking

After marking the peg location on the faces of the two leaves I stood them on edge, clamped them together and marked the centerline of the hole on the edge.  Both leaves are marked at the same time to for registration.
Transferrng Peg Location to Edge of Leaf

The jig is supposed to center the holes on the leaf edge but just in case I always face it the same way on all the holes in all the leaves.  The tape covers all the holes except for the one I will use.  Anything I can do to make this idiot proof.
Doweling Jig

For side to side alignment the reference line on the jig has to be aligned with the pencil mark on the leaf.  If they don’t line up between leaves then when they are put together they won’t align.  I use a flashlight and a magnifying glass to accurately locate it.  Top photo is from the side and the bottom one is from the top.
Aligning Doweling Jig Used to Make Peg Holes

Using Jig to Drill Peg Holes
Last thing to check is to make sure jig is flat on edge.  If not, then the hole will be drilled at an angle and you guessed it when the pieces are put together they won’t align.  Lots of things can go wrong but it just takes being careful to get it right before drilling the holes.

After drilling the holes the leaf is set back on the table, the pegs are installed in one leaf and a test fit is made.  If I did everything perfect and there was absolutely no error in any of my measurements, or error in setup, the tolerances in the jig were perfect and the pegs were exactly the same size then the leaves would slide together like magic.  HAHAHAHA, not likely.  No matter how careful one is there will be variances, I just try to minimize them.  In this case the leaves fit pretty well.  I needed just a little fine tuning on some of the pegs in order to get a snug fit at the tapered end, perhaps too snug.   I may need to make the fit a little less snug.  As I take them apart and put them together during the rest of the build I will keep that in mind.

Test Fit of Pegs

With the fitting of all the leaves and pegs done I started sanding.  The thickness sander work stopped with 100 grit so I started with 120.  There were a few very minor spots where the joints didn’t line up and the 120 grit does a good job in cleaning these up as I go through and remove all the 100 grit sanding marks.  In this case I use two sanders both with 120 grit, it just speeds things up.  I like woodworking but not so much sanding.  This is not the final sanding grit as later I will go on to a finer paper later.

Starting Finish Sanding of Top

Routing the outside edge of the top is next.  It’s about time as I have cut myself on the sharp edges or gotten splinters more than a few times.  The final perimeter edge treatment has a top round over with a 3/8” radius plus a bottom and corner round over of 3/16”.  I did not take any photos of the top and corner routing as I was concentrating on getting the cuts right.  However, the bottom round overs use the same method as the top. 

With the top edge done I flipped the leaf over and clamped some blocking to it so when I route the end grain edge using the 3/16” router bit it will not blow chunks off the edge as I start and end the cut. 

Routing Underside Round Over of Leaf
In the top photo below the end has been routed with the blocking still in place and the bottom is after it was removed and the long edge routed. 

This is a typical finished outside corner.  No sharp corners anywhere to bang into.

The last routing was with the 1/8” round over for the long interior edges of the leaves and the corners where the abut.  All went well until I was almost to the end of the last edge when some splinters went flying leaving me with a chipped out edge.

#@!* Chipped Edge

Fortunately, it is on the underside of the leaf so only a few bad words were said.  The fix is not really hard, just somewhat time consuming.  First, I cleaned up the damage using a chisel and a sanding block to get a good place to glue on the patch.

Chipped Area Prepared for Patch


Next is to find a piece that closely matched the wood color and grain.  With a piece in hand I sanded a flat to fit at an angle so the grain in the patch matched the leaf.  I applied yellow glue sparingly then used heavy masking tape to hold the patch in place and went to lunch.

Patch Glued and Held in Place with Tape
After letting the glue cure over a long lunch I took the tape off then using a rasp and a couple grits of sandpaper worked the patch down flush with the adjoining surfaces.  The whole patch is about 5/8” long and when done is nearly invisible.
Raw Patch Glued in Place & Finished Patch

Here is the joint between the leaves showing how all the three sizes of round overs go together to eliminate any sharp edges.

Completed Routing Between Leaves
Assembling the leaves back on the table where they go looks like this.  Also, believe it or not a final decision has been made on the playing surface/pad color and it has been ordered.

Table Top with Routing Done


Next Up – Top Brass Pins, Leaf Seal & Applique Pieces