
Starting on the knobs used to tighten the hold down in
place is next. This begins by taking
some thin pieces left over from resawing oak for other projects then gluing up
three layers with the grain in the center piece 90 degrees to the face layers,
just like plywood. This will give the
knobs some additional strength to resist splitting along the knob’s long
dimension. You can see the three layers
in the bottom edge on photo below. Once
glued the plywood block gets divided into three more or less equal width blanks
and cut using the bandsaw.
After cutting the knob shape laid out on one it’s
back to the bandsaw to cut it out. In
the photo below I have just finished making the last cut on the prototype. To keep my fingers away from the blade one of
the quarter sawn white oak deep reach Cam Action clamps I made is used.
After being rough cut on the bandsaw the large disk
sander is used to smooth and shape the edges.
When satisfied with the shape it’s checked to see the part is
symmetrical and used to trace the shape on the other two knob blanks. They are cut out and sanded to final shape
just like the prototype.
Using a small drill bit in the drill press a center
locating hole is made. It will be used
to mark the centers of the other two knobs and then for centering additional
drilling operations.
To transfer the center-point the knob with the hole is
stacked on top of another knob then both are clamped together so the edges are
aligned and a drill is used to make a shallow hole in the bottom knob. The
same process is used for the third knob.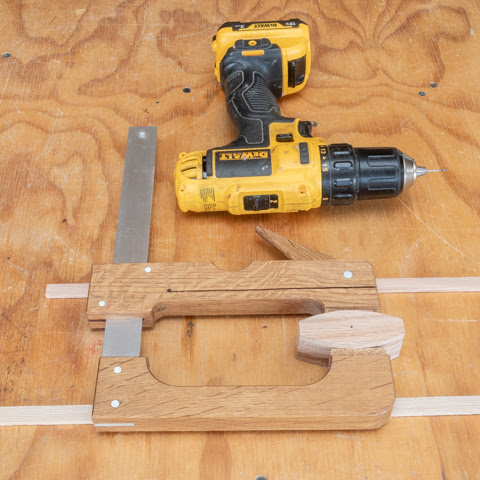
Completing the drilling is a two-step process. First is to take a flat bottom Fostner bit
and drill a hole ¼” deep. This is for
the ¼-20 nut that gets epoxied in there.
The second step is to drill a through hole for bolt access. Both holes are drilled using the center
reference hole drilled earlier. Below
you can see the drill bits and successive steps.
Epoxying the ¼-20 nuts in the recess is next. This photo shows the nuts in with the epoxy
covering them. It’s a little messy
looking but I wanted to make sure the gap between the flats on the nut and the
drilled hole were completely filled as well as having the epoxy a little higher
than the oak knob’s surface.
As you can imagine the threads in the nut get some epoxy
on them. The easy way to clean the epoxy
out is to run a tap through the nut. The
tap follows the existing nut’s threads cutting away all the excess epoxy leaving
a nice clean surface. The top is still a
mess and gets taken care of next.
Removing the excess epoxy is done using two sheets of
sandpaper clamped to the table saw extension.
The reddish sheet on the left is 120 grit while the yellow sheet is 220
grit. It does not take much time at all
to sand off the excess epoxy leaving a nice flat oak surface. Last, is to use the hand sanding block at the
top which is loaded with 320 grit paper.
The bottom photo shows the finished sanded knob. It also shows the three layers of oak in the
shop made plywood. One untended
consequence of sanding all the surfaces smooth is the edges are pretty
sharp. Believe it or not I have cut
myself on this type of edge so they need to be addressed.
There are a few ways to get rid of the sharp edge. One is to “break” the edge by sanding it to
either a chamfer or slightly rounding it.
However, in this case I wanted a softer edge so used a 1/8” radius roundover
bit in the router table. The photo shows
the bit, knob and the safety gripper I use to keep my fingers away from that bit
spinning at 15,000 or so RPM’s.
Once the routing is done the knobs get a little hand
sanding with 220 grit sandpaper to smooth out the routed end grain and do
blending as needed. Below is a side and
top view of a completed knob ready for its finish to be applied. The side view shows a good view of the knob’s
three-layer construction.
With the knobs ready for their finish, I can go back to
complete the last bit of woodworking on the hold downs. That's a slot to cut at the
top of the arc for the bolt to pass through.
The bolt along with the knob applies pressure to the hold down. The drill press is used to make the slot
starting by clamping the hold down to the drill press’s fence and moving it
until the center finder aligns with the slot’s punched center point. That’s show in the photos below.
Next the center finder is removed and with the drill bit
installed a hole drilled. After that the
hold down is slid over so the other end of the slot can be drilled. A hole between those two is then
drilled. Here the end holes are drilled
and I am ready to drill the center hole.
An additional pair of intermediate holes are drilled out then
the hold down is slid back and forth with the drill fully through the
slot. This cleans up the inside faces of
the slot resulting in the completed slot below.
Last is to break all the sharp edges of the hold down
with sand paper. Here is one of the hold
downs with all woodworking done and ready to finish.
The finish consists of three coats of hand rubbed Danish
Oil Finish. I used this type of finish
rather than my usual sprayed on lacquer as an oil finish can be rejuvenated
down the line as the pieces wear a lot easier than a film finish. When done this is what the completed hold
downs look like.
Here is an example of one of the hold downs in use on a
piece to be drilled. In doing a little testing I think they will work well for light duty clamping.
No comments:
Post a Comment