
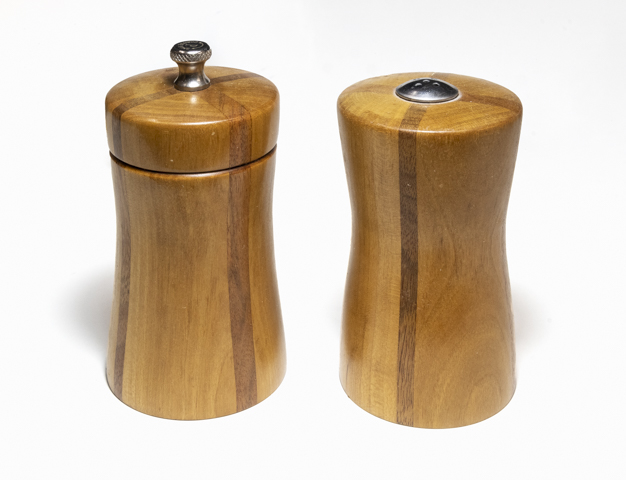
Sometime prior to 2002 I made a laminated walnut and
cherry salt and pepper set on the lathe that has been in use ever since. There has been only one problem with the set
and that is with the pepper grinder. It
works fine for individual use but when grinding a lot for cooking my wrist gets
tired. I tried modifying another grinder
but it was not much better so we continued to use it and complain every time a
lot had to be ground.
That all recently changed when looking through a
woodturning catalog I came across a set of good-looking stainless steel pepper
grinding hardware. It was only about $10
so I ordered it along with some other items that I needed. Here is the hardware and the catalog photo.

The new grinder could have been made out of a laminated
block matching the originals. It
would have been close because I still have a piece of the walnut. However, the new cherry would have never
matched the natural darkening of the 20+ year old wood. What I decided to do was match the shape of
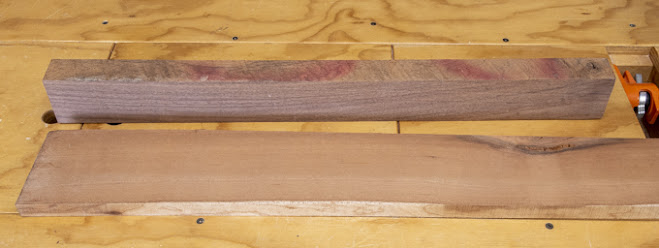
the old set but reverse the woods. The
original pieces have a cherry body with walnut accents. For this piece I will reverse that. Here is the stock that includes the part of
the original walnut plank.
To make the turning blank will require three different glue-ups. The first two are identical, two thick walnut
pieces with a thinner piece of cherry sandwiched between them. Here they are glued and clamped up. The 6-mil polyethylene plastic sheet is to
keep the clamps from getting glued to the wood and the blank from getting glued
to the workbench.

After an overnight cure the clamps are removed to reveal
the glued-up blocks. Here is one of them
and you can see where the dried glue got squeezed out. Because of the plastic sheet it could not get
cleaned up while being clamped. The
paint/glue scraper will be used to remove the excess glue.

The glue needs to be removed from both sides before the
piece gets run through the thickness sander. That’s so the glue doesn’t get
transferred to the sanding drum gumming it up which in turn can cause a burn
mark in the wood. Anyway after a few
passes all the glue is removed and the piece can be run thought the sander to
remove any scraper marks and make sure the surface is flat.

Next the two glued-up blocks get glued together with a
cherry spacer between them. Here it is
all glued and clamped up.

Once the glue cures the clamps are removed and any glue
gets scraped off. Unfortunately, when
scraping the excess glue off I got a little carried away and slightly rounded a
couple of the edges a little. Because
this block is going to get turned round it could have been left that way and
not caused a problem. However, only
about a third of the block is needed for the pepper grinder and the rest will
be set aside for some future unknown project.
Because of that I wanted the block to be square and flat so a flat
reference surface is needed. To get that
surface a shim consisting of a strip of playing card and a single layer of
masking tape is put on the low side to bring it up level. That is shown in the photo below. In use the tape goes down on the feed belt
and opposite side gets flattened by the sanding drum. When it’s flat the shim is removed and that
face of the block gets flattened. As you
can see there is knot on one corner of the block. It probably won’t be a problem as I think it
will be in an area that will be cut away when turned to a cylinder. At least that’s the plan.

Laying out the cylinder and how the knot will intersect
that is next. The top photo shows the
edges of the knot transferred to the top and how they would intersect with the
cylinder. The bottom is a closer view of
that intersection. Since the drawn
cylinder is a little larger than the diameter of the finished pepper grinder It
looks like the knot will get cut away.

Cutting off the pepper grinder blank is next. The rest of the block on the left will be
stored away with my other blocks for something else. Maybe another salt/pepper set as a gift???

Using the bandsaw to rough out the cylinder is next. When making this cut, I noticed a bit of
burning which when making tight curves is not uncommon but here it’s more than
usual. Also, more pressure was needed to
make the cut than normal. This blade has
cut a lot of material in the past two years including ripping a couple pieces
with nails that were hidden damaging the blade.
All in all it’s time to retire that blade and put on a new one. On the lower left of the photo there are two
cutoffs laying down. They are from the
corner where the knot was and got completely cut away so that’s not going to be
a problem.

With the blank mounted between centers in the lathe the
turning can start using a roughing gouge.

The rough turning down to a smooth cylinder went well as
both walnut and cherry turns really nice. However, when I stopped the lathe to check on
the diameter I discovered a little
crack on one edge of the blank circled in red in the top photo. Fortunately, it didn’t look very deep and a
little more turning cut it away so it ended up not being a problem but I have
had cracks like that show up and end up being a real problem. With that concern out of the way I finished
up the rough turning taking the blank down to a smooth consistent diameter a
little oversize so the drilling for the grinder’s hardware could start.

Next Up – Drilling & Turning to Shape
No comments:
Post a Comment