
In this photo the jaws in the chuck have been changed out to a larger size so they are big enough to grab onto the tenon I left at the bottom of the bowl. The bowl has also been hollowed out and sanded.
With the inside of the bowl done it’s taken out of the 4-jaw chuck so the base can be turned to shape. To do that requires the chuck’s jaws changed out to the jumbo set shown below. The bottom photo is a closer view that better shows the tailstock live center using a pencil eraser to put just a little pressure on the bowl to help keep it in the jumbo jaws. These jaws have rubber mounts so they don’t mar the bowl’s completed outside face but don’t have near the holding power of the steel jaws. 
When nearly finished shaping the bottom the tailstock is pulled back and the final shaping and sanding is done. The last bit of work to do on the bowl while it is still in the lathe is to drill a small reference hole centered on the bottom of the bowl. This will be used later when the piece is assembled which I am still working on how to do.
After the first bowl is done, the same steps are followed to make a second bowl. Here is what the two of them look like.
Next is to make lids for the bowls. They are made from oak with a slight arched top and a short lip that fits inside the bowl to hold the lid in place. Once turned the oak will get the same Inda ink treatment as the other blackwood pieces.
As with several of the other pieces I want the lids to match so it’s time to make another template. Same process of printing out a full-scale drawing and adhering it to a backer board as shown in the top photo. The bottom photo shows the cut-out with a sanded fair curve template identified by the red arrow. The bottom piece will probably have not much use other than reference when turning the top but may come in handy when working on the handles.
Here is the oak blank with the two slightly oversize lids laid out ready to be cut on the bandsaw. If you look at the closeup in the upper left you can see the joint where I glued two pieces together to get the width needed. Same preparation process as with the other glue-ups so no reason to go into detail again on how that’s done. One thing to note is this is the ugly side as the grain here does not match as well as the other face. Once turned the exposed show face's joint will be barely visible even before the India ink is applied.
Before the bandsawn blank gets mounted in the lathe on the 4-jaw chuck a 2 ½” diameter recess 3/16” deep is drilled for mounting. It's then put in the chuck and squared to the lathe’s axis like before. Using the template as a guide the blank is turned to the right diameter and the arched top is turned to shape and sanded shown in the left photo. Also, in the left photo you can see the little dimple from the live center. That’s not a problem because it will get cut away when I drill a hole to mount the lid’s handle. The right photo shows the sized lip or tenon that will drop in the bowl holding the lid in place. As shown the tenon is longer than it will be when the lid is finished. It will get cut down later when that face gets turned. Not yet done is the softening of the top lip edges. That work is done with both lathe tools and sandpaper. Also, the pencil line on the edge is only used for reference when the top edge is softened.
With the top face done the medium jaws get removed from the 4-jaw chuck and the jumbo jaws put back on. Here the photo shows how the rubber bumpers grasp the lid so I can remove the 2 ½” drilled recess and cut down the tenon to its final size. At this point the face is mostly turned but still needs some work to smooth out this inside face.
This is what the bowl and lid look like together with the lid’s edges softened. Also, remember when all done the lid will be black and not the light oak it is now. If you look closely, you can see the small reference dimple centered in the top. That will let me locate the hole where the finial gets attached whose design is not yet finalized. I have done about six very different designs and none of them are quite right - yet. Anyway, with the first lid done I can get started on the second one.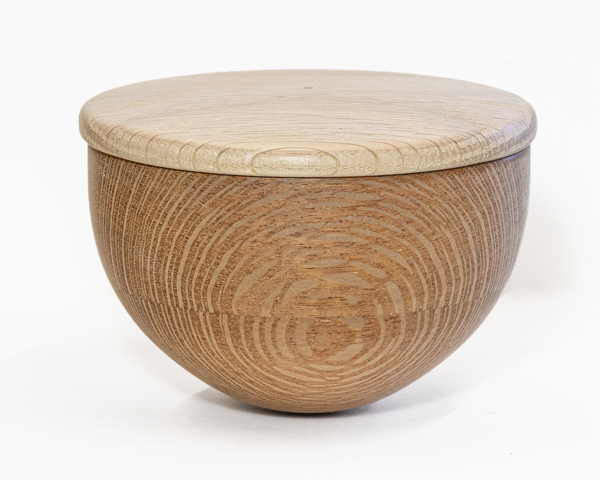
As I was finishing up the second lid, I noticed the lathe tool wasn’t cutting as cleanly as it should meaning it needed to be sharpened. Normally after grinding the tool sharp then turning for a while when the tool gets dull it’s honed with a diamond stone to touch up and sharpen the edge. Well re-honing is a valid fix for only so many times and then the tool needs to be reground. The top photo is a closeup of my ½” tool that needs to be reground. The red arrows point to places that over time the honing has degraded the ground edge so now regrinding is needed for restoration. I use a jig shown in the bottom photo to hold the tool at a consistent angle in conjunction with a base at the grinding wheel. The tool’s cutting edge has been colored green with a marker so I can tell when all the edge has been cleaned up and reground.
After grinding the edge is restored to its proper geometry, cleaned up and ready to go again. I am not sure when I reground the tool the last time but I know it’s done a lot of turning since then.
With the tool sharpened I finished the second lid. Here are both lids, their bowls sanded and ready for the next step.
Next Up – Foot, Body & Bowl Connections Part 1
No comments:
Post a Comment