Router Plane

Monday, February 24, 2025

Turned Art Object – #13 Making & Attaching the Caps

With the bevels made on the cap blanks the pattern is used to lay the four caps on them.  Only wrinkle here is due to the bevel only one side of the pattern can be traced at a time.  After the first side is done the pattern is rocked on the center line so it lays flat on the second bevel being careful to make sure the pattern does not shift so the other side can be traced.

The caps get cut out using the scroll saw just like the pattern.  Here is the scroll saw along with what the blank looks like after one of the caps are cut out.

That’s followed by using the big disk sander to clean up the edges and blend all the curves together.  The bottom photo shows that the scroll saw left a pretty good edge although it does not follow the line exactly.  Now I could have spent more time cutting close to the line but I would still have to finish cleaning up the cut on the sander blending the curves and it’s just easier to cut close to the line and smooth the edges with the sander.

Below the photo on the left shows what a cap looks like before sanding and the on the right is after.

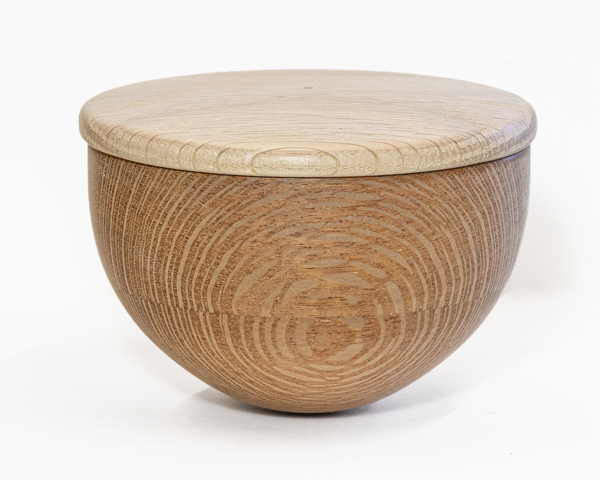
Next the edges of the caps get a small radius hand sanded on them to make the edge look softer, thinner and to continue the general roundness of the piece.  Since the caps are too thin to use any power tools the edge has to be put on by hand using something like small detail files or sandpaper.  Some testing led me to use sandpaper rather than files or a scraper.  The edge work starts using 80 grit sandpaper to rough out the shape, followed by 120 grit paper to refine the edge and finishing up with 220 grit paper.  The top photo shows a completed cap and the bottom photo shows the caps just set in place.

Applying the first coat of India ink is next.  The top photo shows everything ready to go and the bottom shows the finished first coat.  There are some white specs that are pores in the oak that did not get dyed but that’s normal and will get touched up.

The next day all the black pieces get the odd white specks touched up.  Additionally, the center part of the oak dowels that are exposed when the bowl and the body are connected get a coat too.  They are in the lower left next to the India ink bottle and have the ends wrapped with blue masking tape.  This is to limit the ink and lacquer application so there is bare wood available for gluing.

While I was working on the dowels there are a couple of finishing touches.  The top photo shows a small hole in the end of the dowel and that’s to provide a little space for any extra glue to go to when the pieces are assembled.  The bottom photo shows two end cuts made on the scroll saw to allow a path for the glue to escape to the center hole.

Next is to start gluing the caps onto the body.  Because when installing the caps there is little or no room for error since if the small overhang is not just right it’s going to be very apparent.  Also, when applied the glue acts like a lubricant and pieces can easily slide out of position during clamping.  To keep this from happening I tested four ways using scraps to keep the caps in place while the glue dries.  

  • I started by trying to use the pneumatic pin nail gun on a sample to shoot a very thin 22 gauge (.0253”) headless nail through a cap cutoff into a scrap of the body.  The problem with this is when the nail is shot in place the head is just a tiny bit below the surface which leaves a small hole in the cap.  As the cap is small to begin with the hole would be fairly obvious.  
  • Using a dab of hot melt glue in the center of the cap to hold it in place until the glue cures worked better.  However, this got eliminated because of the short amount of time for adjustment before the glue cools off and the ability to make adjustments is lost.  Also, if not enough downward pressure is applied before it solidifies there can be a gap between the cap and the body.  
  • Using super glue to hold the piece in place while the wood glue cures didn’t work to well.  In some testing the spot of super glue that was available wasn’t big enough to hold the pieces tightly together.  It also didn't allow much time to make adjustments before the glue set.
  • What I ended up doing was to shoot two of the small pin nails part way in the body where the cap gets glued on.  The pictures below show what I mean.

Next is to very carefully to locate the cap exactly where it needs to go taking all the time needed.  Once in the right position the cap is pressed down onto the body and the pins poke reference holes in the underneath side of the cap.  The two red arrows point to those holes.

Now glue can be applied to the cap and using the locating pins in the body the cap with its holes can easily be put back in exactly the same place.  In addition, the cap won’t slide around while being clamped.  The photo shows the cap (red arrow) clamped in place.  Only one cap at a time is glued in place to eliminate any chance of it moving.

Finishing everything except for the lid and its finial, which I am still doing designs for is next.  Preparation of the shop includes blowing off the equipment, giving the floor a good cleaning.  The workbench and the places where the sprayed pieces are set to dry after spraying along with the cardboard sheets used to protect the workbench from overspray all get wiped down with a damp cloth.  A satin finish lacquer will be sprayed on and probably three coats will be needed.  This photo shows all the pieces final sanded and ready.

This is my typical assembly of items for spraying lacquer.  On the far left is the gallon can of lacquer with a smaller bottle used for mixing since it’s easier to pour out of.  Side note, the green line on the side of the can shows how full the can is.   To its right at the back is the lacquer thinner and in front of it is a small bottle for mixing.  On the right at the back is my mask with N100 filters that also remove organic and acid vapors.  In front of the mask is a bottle of lacquer that has about 25% by volume of the thinner added and is ready for use.  In front of that bottle is a smaller bottle that is attached to the air brush used to spray the lacquer onto the pieces.  Last, at the front is a pair of gloves used to protect my hands when spraying.

Next Up – Spraying Lacquer, Assembly & Finial Options


Monday, February 17, 2025

Turned Art Object – #12 Drilling Base Holes, Fitting Dowels & Making End Cap Blanks

With the four body holes drilled there are still at least four to go.  One in each of the bases and bowls that will be drilled next.  There is also may be one in each of the bowl’s tops but that will come later.   Locating the holes in the base is pretty easy.  Because the base is made from two pieces it has a glue line running down the center so I will use that for the front to back centering line.  The side to side is fairly easy in that all that’s needed is to measure from the glue line at the bottom to close to the center then without changing the caliper do the same from the other side.  If the points meet that’s the center if not the difference is split and remeasured.  It takes two or three iterations to get equal measurements and find the center.

Using the derived center point the base gets its hole drilled.  Same process is used for the other base.

Last of the major holes goes in the bottom of the bowl which already had a center point located while the bowl was clamped in the jumbo jaws and the bottom was having its final shaping done.  The photo here shows how that center point and the center finder in the drill press’s chuck are used locate the bowl.  Once in place the fence and clamps are used to lock the bowl down tight.  From there the center finder is removed, the drill bit installed in the chuck and the hole drilled.

To do a test assembly of the base, body and bowl I need two dowels.  One at each of the connection points shown by the red arrows in the top rendering.  The top arrow will be an oak dowel blackened with India ink.  The bottom arrow will be a cherry dowel since there will be tiny bit of it exposed where the pieces come together.  More on that in a bit.  The bottom photo is of the cherry dowel in the lathe ready to parted off.  The little stub at the left end of the dowel is sized to fit in the hollow part of the live center that’s on the right side of the photo.  It will be used to help center the dowel blank for the second dowel.

Here's how the pieces look so far dry fitted.  In the top photo the top oak dowel which is a little long and the lid to the bowl still needs to have India ink applied but it gives an idea of current progress.  The bottom photo is a close view of the bottom cherry dowel and shows the little bit of dowel that will be exposed. 

With all the parts completed except for the end caps and finials I decided to go back and take another look at the end caps.  When the prototypes were made in Post 8 Finish Base & End Cap Prototype the overall shape was OK but didn’t look quite right.  In reviewing them I think they are too thick and the overhang is a bit much.  Reducing the cap’s thickness is easily done by making a few more passes with the blank set in the jig through the thickness sander.  Here is the before at the top and the thinner after view on the bottom.

The cap’s overhang is also reduced.  The photo on the left shows the current cap and the center photo has a new edge drawn in at the red arrow.  After the cap was resized to the line using the large disk sander to cut away the excess material it looked better but was still a little bulky.  Redrawing a new perimeter line all around the outside a bit over 1/32” smaller followed by sanding that off ended up looking good per the right photo even though it’s hard to tell in that photo. 

Shown here the left cap is the original prototype and the right one is the new resized thinner one.  I also sanded a small radius on all the edges to go along with the curves in the rest of the piece.  These changes make the cap more in scale to the rest of the piece and is how I will make the final oak ones.

Making the blanks for the caps is next.  They were ripped on the bandsaw from a single thicker piece of oak.  These pieces were run through the thickness sander to get rid of the rough bandsaw face and brought down to the correct thickness.  Same procedure as used for other parts so no need to go through the steps again.  Just like the prototype the sized oak blank is set in the jig to bevel the top face and run through the sander.  Here everything is set up ready to go with the red triangles showing the area that will get sanded away.

The beveling process is to run the blank through the sander which takes material off the high side then flip it end for end and run it through again.  The same thing is done with the second blank then the sander is adjusted to take off a little more and the sequence repeated.  Here I am about half way done with the making the bevel.  The little red sliver on the end is what still needs to be removed from each side and the red arrows mark the current unbeveled area.  When the flat center section is gone the bevels are done.

This is what the completed bevels look like coming together in the center to a nice straight edge.  One other way I could tell they were right is the marks that were on the right side of the blank’s jig and at the back have been sanded off.  If you look at the previous photo you can see where they were.

Next Up – Making & Attaching the Caps


Monday, February 10, 2025

Turned Art Object – #11 Foot, Body & Bowl Connections Part 1

With most of the turning done I turned my attention to figuring out how to attach the foot to the main body and the main body to the bowl.  Those two connections are identified with the red arrows.  The bowl to body connection will require a spacer to center the bowl in the opening while the bottom connection between the body and the foot just set against each other.

Three different methods were tried in different test pieces made from scraps.  The first uses a simple screw run up from the foot into the body or from the inside of the bowl down through a spacer into the body.  There are two problems with this method.  Without a flat spot at the joint (red arrow) I could not get the connection tight enough to prevent the pieces from rocking back and forth with the small single point of contact between the two parts.  The bottom photo shows the minimum size of the flat spot highlighted in red required for stability and is just not acceptable for the piece.

The second method is to use a threaded piece of ¼” steel.  Holes are then drilled in each piece and threaded with a bottoming tap.  Assembly is done by screwing the two pieces onto the rod.  This worked better than the screw but there was a couple of problems.  First, there is a limit to how tight the pieces can be screwed down without stripping the threads in the wood and second was that though the assembly was stiffer it still wasn’t as rigid as I wanted so this is out.

In the third method ½” diameter holes are drilled in each piece.  A ½” diameter oak dowel is then inserted and glued in place resulting in a rigid connection with no flex.  I think this works because in both the screw and threaded rod samples the connection’s rigidity is a function of how tightly the two pieces are held together at a single point of contact where the two curved surfaces meet.  That’s why when I added a small flat on each of the pieces in the first example the joint became more rigid as the size of the flat increased.  When the ½” oak dowel is used the size of the point of contact became irrelevant since when the foot, dowel and body are glued together the dowel has to bend for any deflection to occur.  At least that’s my theory.

With a method of joining the pieces together the next step is to locate the holes and that is not a simple task on these curved pieces.  First to locate is the hole’s center inside of the body.  The side-to-side center is found by putting a square on the centerline of the opening and transferring that to the blue tape. 

To find the front to back center the piece is laid on its face then an adjustable square is used to measure the overall width.  Half that dimension locates the front to back center and the intersection (red arrow) with the side-to-side pencil line is where the hole will be drilled. 

Now that I have a center point where the dowel hole will be drilled, I need to mark it in line with the center line of the body’s arc.  That requires the setup shown in the top photo.  A backer board gets clamped to the drill press fence then the piece’s body gets clamped to the board.  An electronic level (red arrow) is set on a steel rule and used to level the beveled ends of the body.  That way I know the hole will be drilled square with the body’s center line.  The center finder is run down toward the body which gets adjusted by moving the fence forward or backward and the backer board side to side until the center finder lines up with the center point on the blue tape as shown in the bottom photo.

Swapping out the center finder for the ½” Forstner bit and drilling the hole is next.  The tape is my depth gauge.  The bottom photo shows a nice clean cut through the blue tape.  It took maybe 30 seconds to actually drill the hole and probably at least an hour coming up with a way to locate the hole and setting up the drill press to make the hole then double checking to see if everything was accurate. 

Drilling the outside hole in the body is next.  Accurately locating this hole proved to be much more difficult that the inside hole.  Mostly because the outside hole is further from the center both vertically and horizontally.  The two photos below show the Rube Goldberg assembly of parts used to locate the center point of the hole.  

1. Like the inside hole a ruler is used to locate the center point.  

2. Next a combination square is clamped down so its right-side face is on the ruler’s center line.  

3. A small 90-degree triangle is used to set the combination square at 90 degrees to the ruler.  

4. The small machinist square gets clamped to the combination square so its inside face aligns with the center line of the body and is parallel to the base of the combination square.   

5. Last an electronic angle gauge is attached to the machinist square using its built-in magnets.  When it reads 90 degrees the combination square is plumb so the square’s blade is aligned with the body’s center line.  

When everything is plumb and square, I can make a line at the top of the body that gives me the side-to-side center line for the hole.  Sorry for the long-winded explanation but there’s a lot of moving pieces to accurately locate this line.

The body then gets clamped and aligned in the drill press just like when the inside holes were drilled.  Last is to set the front back so the drill bit is centered on the crown of the body.  That’s all been done in the top left photo.  The other two photos are of the drilled hole which looks symmetrical from both front and side views which is a very good thing.

To verify that the holes are really square, plumb and true an oak dowel is inserted the into the hole to see if it is vertical from both front and side views which they were and that’s a huge relief since fixing an out of alignment hole is not something I want to try and do.

Next Up – Drilling Base Holes, Fitting Dowels & Making End Cap Blanks


Monday, February 3, 2025

Turned Art Object – #10 Finishing the Bowl & Making the Lid

In this photo the jaws in the chuck have been changed out to a larger size so they are big enough to grab onto the tenon I left at the bottom of the bowl.  The bowl has also been hollowed out and sanded.

With the inside of the bowl done it’s taken out of the 4-jaw chuck so the base can be turned to shape.  To do that requires the chuck’s jaws changed out to the jumbo set shown below.   The bottom photo is a closer view that better shows the tailstock live center using a pencil eraser to put just a little pressure on the bowl to help keep it in the jumbo jaws.  These jaws have rubber mounts so they don’t mar the bowl’s completed outside face but don’t have near the holding power of the steel jaws.  

When nearly finished shaping the bottom the tailstock is pulled back and the final shaping and sanding is done.  The last bit of work to do on the bowl while it is still in the lathe is to drill a small reference hole centered on the bottom of the bowl.  This will be used later when the piece is assembled which I am still working on how to do.

After the first bowl is done, the same steps are followed to make a second bowl.  Here is what the two of them look like.

Next is to make lids for the bowls.  They are made from oak with a slight arched top and a short lip that fits inside the bowl to hold the lid in place.  Once turned the oak will get the same Inda ink treatment as the other blackwood pieces.

As with several of the other pieces I want the lids to match so it’s time to make another template.  Same process of printing out a full-scale drawing and adhering it to a backer board as shown in the top photo.  The bottom photo shows the cut-out with a sanded fair curve template identified by the red arrow.  The bottom piece will probably have not much use other than reference when turning the top but may come in handy when working on the handles.

Here is the oak blank with the two slightly oversize lids laid out ready to be cut on the bandsaw.  If you look at the closeup in the upper left you can see the joint where I glued two pieces together to get the width needed.  Same preparation process as with the other glue-ups so no reason to go into detail again on how that’s done.  One thing to note is this is the ugly side as the grain here does not match as well as the other face.  Once turned the exposed show face's joint will be barely visible even before the India ink is applied.

Before the bandsawn blank gets mounted in the lathe on the 4-jaw chuck a 2 ½” diameter recess 3/16” deep is drilled for mounting.  It's then put in the chuck and squared to the lathe’s axis like before.  Using the template as a guide the blank is turned to the right diameter and the arched top is turned to shape and sanded shown in the left photo.  Also, in the left photo you can see the little dimple from the live center.  That’s not a problem because it will get cut away when I drill a hole to mount the lid’s handle.  The right photo shows the sized lip or tenon that will drop in the bowl holding the lid in place.  As shown the tenon is longer than it will be when the lid is finished.  It will get cut down later when that face gets turned.  Not yet done is the softening of the top lip edges.  That work is done with both lathe tools and sandpaper.  Also, the pencil line on the edge is only used for reference when the top edge is softened.

With the top face done the medium jaws get removed from the 4-jaw chuck and the jumbo jaws put back on.  Here the photo shows how the rubber bumpers grasp the lid so I can remove the 2 ½” drilled recess and cut down the tenon to its final size.  At this point the face is mostly turned but still needs some work to smooth out this inside face.

This is what the bowl and lid look like together with the lid’s edges softened.  Also, remember when all done the lid will be black and not the light oak it is now.  If you look closely, you can see the small reference dimple centered in the top.  That will let me locate the hole where the finial gets attached whose design is not yet finalized.  I have done about six very different designs and none of them are quite right - yet.  Anyway, with the first lid done I can get started on the second one.

As I was finishing up the second lid, I noticed the lathe tool wasn’t cutting as cleanly as it should meaning it needed to be sharpened.  Normally after grinding the tool sharp then turning for a while when the tool gets dull it’s honed with a diamond stone to touch up and sharpen the edge.  Well re-honing is a valid fix for only so many times and then the tool needs to be reground.  The top photo is a closeup of my ½” tool that needs to be reground.  The red arrows point to places that over time the honing has degraded the ground edge so now regrinding is needed for restoration.  I use a jig shown in the bottom photo to hold the tool at a consistent angle in conjunction with a base at the grinding wheel.  The tool’s cutting edge has been colored green with a marker so I can tell when all the edge has been cleaned up and reground.

After grinding the edge is restored to its proper geometry, cleaned up and ready to go again.  I am not sure when I reground the tool the last time but I know it’s done a lot of turning since then.

With the tool sharpened I finished the second lid.  Here are both lids, their bowls sanded and ready for the next step.

Next Up – Foot, Body & Bowl Connections Part 1