With the breadboard ends ready to go the last thing is to
drill pilot holes in the top’s center section.
They are located by setting the breadboard end in place then using the
same drill bit used for the breadboard pilot hole drill a little dimple into the center
section. The setup and resulting dimple
is shown in the two photos below.
After drilling a small pilot hole in the center section
centered on the dimple a test fit with the screws installed is done to make
sure the breadboard overhang is centered.
The screws are removed and a strip of glue about 2” wide is added to the
center of the groove in the breadboard.
The glue gets added in the groove rather than on the tongue so any
excess glue is pushed into the groove rather than down the face of the tongue
and squeezed out onto the visible top faces.
The breadboard is put back on the center section and the screws run in. Last step is to double check the breadboard
overhang. Here is the screw used ready
to go in.
Adding the plugs is next.
I kept the cutoff ends of the breadboards to get as close a match to the
grain and color as possible. Here is the
left cutoff with one plug cut. I know
it’s for the left side because there is an “L” on it. The blank is flipped end for end and the
second plug cut.
After the plugs are popped out a little time is spent
deciding which one matches the grain the best.
Once decided a dot is added at the top for reference. The two photos below show the plugs glued in
place and taped ready to be cut off after the glue cures.
After curing the plugs are cut off using a fine-tooth
Japanese pull whose teeth have no set.
That’s followed by sanding the surface smooth starting with 80 grit
paper and ending with 220 grit. Here is
what the final sanded plug looks like. 
After the plugged ends are done the top joint between the
breadboard and center section is sanded flush then the entire top is sanded
smooth. Last a slight bevel is added to
all the edges. Here is what the top
looks like ready to be stained.
After staining the top and letting it dry overnight it’s
time to put in the splines. The first
one is pretty simple. Some glue it added
to the sides of the pocket where is goes but only on the center section as the
breadboard ends have to be free to move.
A clamp is used to gradually pull it into location. It has to be done carefully as it’s a one-way
trip into the pocket because if you go too far, they can’t be removed without
destroying them. The one on the opposite
side follows the same basic process except some spacers need to be added
because I don’t want to put any pressure on the just installed spline. It would be just my luck that it would get
pulled in deeper rather than the one on the other side. Here you can see the spacers on the left
already in place and I am ready to add the second spline.
The top photo below is a closeup of spacer and the installed spline. The bottom photo shows the spline setting on the top with everything ready to add the glue and install.
Here the spacer is glued in place and the clamp has been
loosened slightly. With all four splines
installed the top is ready to be sprayed with lacquer.
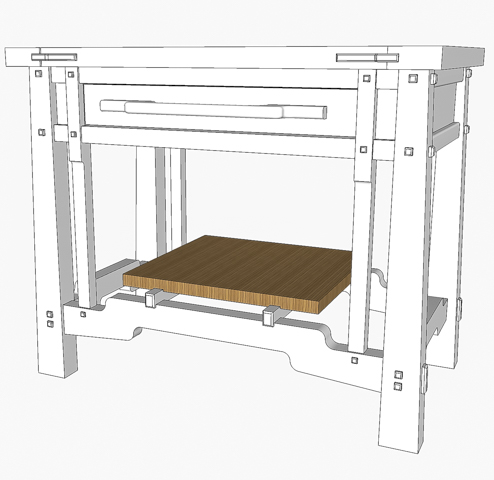
Everything is now ready for the sprayed lacquer finish except for the shelf. As mentioned earlier I was trying to decide what equipment to use on what pieces so here is what is used on which pieces. The pegs, handle and the ebonized cross supports were already done with the airbrush. They are small and using the airbrush works well. The lower rails, legs, spindles and lower rails will also be done with the airbrush. The HVLP sprayer will be used for the veneered panels along with the adjacent upper rails plus the top, drawer parts and shelf.
The shelf is another story. It has a couple of dados cut into it so it
fits over the ebonized cross supports and those dados need to be precisely
located. Therein lies the rub. As I have said numerous times one has to keep
in mind the proper sequence of work or it can cause problems later on. Well now is later on. I should have fitted the shelf when everything
was assembled and before the shelf supports were finished, but didn’t. Now they are off the base plus the supports
have been lacquered and both them and the base are masked off to keep the glued
areas finish free. I could take the tape
off, put the supports back on being careful not to damage their finish when
being assembled, fit the shelf then disassemble and remask the glue joints but
I won’t. Everything will be finished
and assembled except the shelf. After
that the shelf will be fitted, stained, finished and installed. I believe there is less possibility of
damaging the stained or prefinished pieces with this sequence. More time yes, but I have the time.
Some time ago the stained and dyed plugs got their three
coats of lacquer. Ever since then they
have been sitting in their holders. They
were done early because I wanted to lacquer to cure and harden for some time
before their install. I believe by now
they are cured and can be removed from the holders then set aside until they
are needed. Here is what they look
like. Installing the plugs is one of the
last things to be done.
Next Up – Finishing & Installing Pegs Part 1


No comments:
Post a Comment