
Back in post #14 Faux Tenons, Side Spacers & the Back
I made and fitted the faux tenons that would go through the legs. Now it’s time to do a final check and
complete the work on them. That starts
with making sure there has been no change in their required length after the
frame has been glued together. With that
checked out the distance they will be exposed is marked using a marking knife
as shown below. I need to know where the
edge meets the face of the leg so I can soften the faux tenon edge.

Removing the piece in the left photo you can see the cut
left by the knife. That gives me the
limit of the exposed edge which is then very softly rounded to get rid of the
sharp edge. The right photo shows an
edge on view where the left edge has not been rounded but the right side one
has. It’s pretty subtle looking but that
small bit of rounding makes quite a difference when you feel the edge.

After the second edge is done the piece is put back in
the mortise to check and see if the rounding needs any more work. Here is what the finished faux tenon looks
like dry fitted in place.

 In the last post I talked about staining the backs before
assembly to eliminate any exposure of unstained oak should any of the material
shrink. However, to make sure there is a
good glue joint when the panel is fitted in the groove in legs and rails that
part of the panel needs to not have any stain.
If it was a dye using alcohol as a carrier then I would not worry but
this is an oil-based stain so I think it would be a good idea to take some
precautions. The simple fix is to use
blue painter’s tape and mask off the edge, apply the stain then strip off the
tape. Here is what the back looks like
with the tape in place before the stain is applied.
In the last post I talked about staining the backs before
assembly to eliminate any exposure of unstained oak should any of the material
shrink. However, to make sure there is a
good glue joint when the panel is fitted in the groove in legs and rails that
part of the panel needs to not have any stain.
If it was a dye using alcohol as a carrier then I would not worry but
this is an oil-based stain so I think it would be a good idea to take some
precautions. The simple fix is to use
blue painter’s tape and mask off the edge, apply the stain then strip off the
tape. Here is what the back looks like
with the tape in place before the stain is applied.
Following the edge taping the first coat of a golden oak
stain is applied and the result is on the left.
The following day a walnut gel stain is applied to add some contrast to
the grain and add a little more color to the field. That’s shown on the right piece.

The next day the tape is removed and the plywood is ready
for glue-up with the legs and rails to form the back panel.

A test fit with the plywood, legs and rail is next. Unfortunately, when I got all the pieces
together and clamped in place, I could not pull the assembly square. No matter what adjustment was made the piece
just would not square up. Using a
framing square showed it was really close but when measuring the diagonals, it
was not close enough. When checking the
plywood panel, I found it was out of square just a tad but not enough to cause
the problem. In addition, the plywood
panel had been sized to provide a gap of about 1/16” so when assembled there
would be space in the grooves in the leg and rails for some adjustment just in
case. After a couple of very frustrating
hours I finally found the problem.
Evidently when calculating the size of the plywood panel I got off ending
up leaving no adjustment gap at the top and bottom of the panel. If you are going to have a panel sizing problem
having an oversized one is way better than being too small. All that has to be done is set the fence on
the table saw for the proper width and run the piece through. However, the panel is a little over 72” tall
and the widest cut I can make on my table saw is a bit over 50”. Also, since only 1/16” needs to be removed
from each end I can’t set the fence to take that much off and keep the rest
since the blade removes 1/8”. My
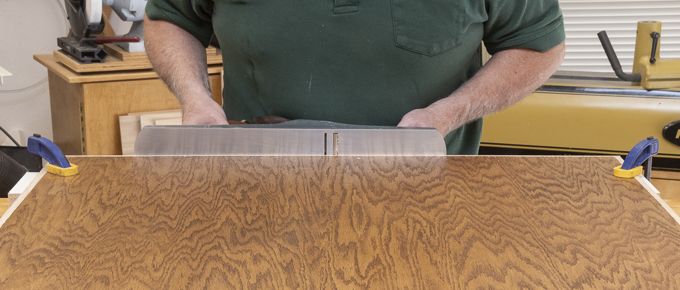
solution is to clamp the panel to the workbench, then using a marking gauge cut
a line 1/16” from the end. Here is what
the scribe looks like along with the mark I need to cut to. Note that the marking gauge is similar to
others I have used except this one has a curved knife to make the mark.

With a mark made showing how much I needed to take off I
could then use the big hand plane to cut back to the line. That’s followed by using the block plane to
put a small bevel back on the panel edge which makes assembly easier. This time when I did the test assembly
everything went together fine and it could be easily brought into square. With the problem resolved I called it quits
for the day and my wife and I went out for pizza.
The next day the pieces were unclamped, dissembled, glue
applied to the tenons and the panel grooves, all 5 pieces put back together for
the umpteenth time then clamped, squared and any glue squeeze out removed. Fortunately, everything went well so the back
will sit until tomorrow when I remove the clamps and go through the whole
process with the other back. Hopefully,
it won’t be as much of a problem.
After the glue has cured overnight the
clamps are removed, the assembly set aside and the test fit is done for the
other back assembly. This one went
together much easier than the first one and squared up on the first
attempt. With that hurdle out of the way
it’s fairly straightforward to go through the same gluing, clamping and
squaring progression as with the first one.
Here is what it looks like completed and ready to let the glue cure
overnight.

The next day all the clamps are removed then the legs and
rails of both backs are sanded up through my final grit of 220. That said before staining I will
lightly hit the surfaces again so everything is a nice and clean. In fact, surfaces of a different roughness
can take the stain differently. That’s
one reason I sanded the legs after scraping them to get that consistent
surface. Sanding is not one of my
favorite things but it is critical to getting a good finish so I break it up
and work on it as I go rather than waiting until the end to do it all. No photo here as an un-sanded piece pretty
much looks the same as a sanded one.
Next up – Side Panel Preparation & a Problem
No comments:
Post a Comment