My original plan was once I had completed the seat mockup I
would start construction using the cherry.
However, I changed my mind and decided to put the seat to further use. I had a section of the 2x6 left so decided to
use it to make a set of rear legs to test the fit and procedure of making the leg-to-seat
joints. My thought was that I could also
use the mockup as practice for the sculptural part of the construction. As the 2x6 was not wide enough to make the
rear legs according to the pattern I changed the design to make a low back
non-rocking chair. Here are the rough
band saw cut modified back legs.
I took one of the rough legs and smoothed out the cut
surfaces then double faced taped it to the other leg and used a pattern router
bit to make exact duplicates. After
taking all the time to clean up and smooth the cut surfaces I am not sure if it
is worth it. The only exception may be
for the reference surfaces, they are probably worth it.
 The procedure for cutting and fitting the modified legs is
similar to the actual ones. There are
some differences so let’s just say I spent quite a bit of time making angled
dados, radiusing corners and talking to myself.
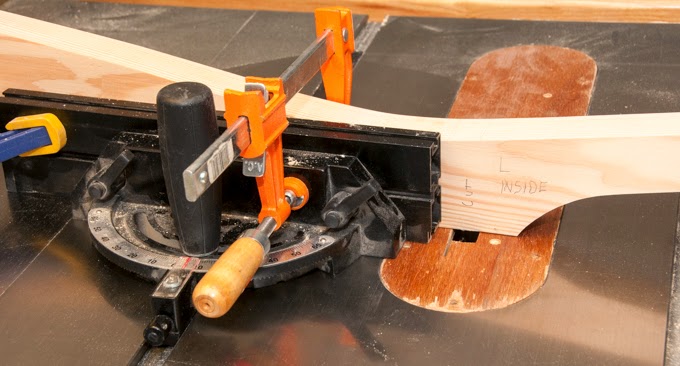
Rather than cover that here on pieces that do not match the final
product I will wait until I get there in the real chair. That said here are a couple of photos of
cutting the dados.
 When I got done with all the work on the rear legs and
turning the front legs on the lathe I clamped all the pieces together including
a temporary top spacer between the back legs.
Here is where things went bad. The front legs are supposed to be straight up
and down but mine were slightly splayed out.
The rear legs did open up toward the top but it looked like not
enough. When I got out the measuring
tools sure enough things were not lining up the way they were supposed to. I finally traced the trouble to the outside
boards of the seat where I had spent all the time cutting the joints. The joints were cut right on as shown by how
the legs fit into them. The problem was
that each of the outside boards that make up the seat are not level but tilted up causing the legs to rotate by a couple of degrees. Not a lot, but a couple of degrees over a few
feet is enough to mess up the size of the headrest and the form of the chair.
 Now I knew what the problem was but had no idea of the why
behind it. I checked the joints between
the boards to see if they were tight and that the cuts were all angled
correctly, which they were. I checked
the jig I had used for drilling the dowel holes to see if it was off, which it
wasn’t. I even went back though the
photos I had taken and they showed everything like it should be. For the better part of two days I measured
and checked every step and cut I had made finding no problem. I really needed to know why this had happened
so I could prevent it on the real chair.
Finally I think I know what happened. There are a couple of differences between the
mock-up and the actual piece. First is
the material, the mock-up is SPF construction lumber, a fairly soft wood while
the actual chair will be cherry which is much harder. Second, the mock-up is made from pieces just
under 1 ½” thick while the real seat will be just over 1 ¾” thick. I think that everything was fine right up to
when I glued the seat together. When I
glued up the pieces and clamped them together a combination of the angled
joints, softer wood, a thinner material and perhaps uneven clamping pressure
caused all the joints to compress and rotate ever so slightly. With 8 surfaces and the amount of clamping
pressure I applied it would not take much to cause a 2 degree rotation. I usually check for any bowing when I glue up
a panel but did not this time. One thing
is for sure I will be checking for this problem when I do the real seat glue-up.
Next Up – The Real Seat: Bevels, Dowels & Leg Joints


No comments:
Post a Comment