
The last piece in the commission is a small box with a
sliding lid whose dimensions are 7 1/8” long by 2 1/8” wide by 1 7/8”
deep. While the walnut box is a
relatively straight forward build it’s the lid that’s the main focal
point. It’s made from maple, walnut and
cherry with about 90 different pieces.
When I made the lid about 13 years ago, I made seven of them but only
two boxes, one cherry and the walnut one shown here. Others have been sold or just kept in storage
waiting to be used for something. Now
one is going to get a walnut box that looks like this and that’s what’s going
to be covered here. I will not be going
through the top construction as that is a rather lengthy build and I don’t need any
more of them.
Looking through my material to find the right size walnut
is first. I did find some walnut just a
bit over the required ¼” thickness that will work out well. Here the parts have been laid out showing
where they are going to get cut from.
The 1/16” thick lid is going to slide in a 1/8” deep
groove a little over 1/16” wide cut into the box’s sides. Unfortunately, the smallest router bit I have
cuts a groove 1/8” wide. To get around
this problem I will make a spacer slightly thinner than 1/16” then glue it into
the routed groove leaving me a space for the lid just over 1/16” wide. Here a piece of walnut just under 1/8” thick
gets run through the thickness sander to bring it down to the thickness
needed. The insert shows a closer view
of the starting piece at the top and the bottom piece (red arrow) being the
thinned down filler strip.
My just cut filler strip is ½” wide and only 1/8” plus
some is needed for fitting. Because the
piece is so thin and narrow there are few ways to rip it down. Using the scroll saw with a fairly
fine-toothed blade is a better option than hand sawing it with a coping saw or
trying to cut it using a sharp knife and steel straight edge.
Next the groove gets cut using the router table and my
1/8” diameter router bit. The top photo
shows the setup and test cut made in a scrap piece. To make sure that the groove gets made on the
right side and along the correct edge the side pieces get marked up with
chalk. It’s not too critical here as I
only want to make sure the best-looking grain and color are on the outside. However, there are times when parts are
handed and there is only one way they can be routed for the part to work. Voice of experience on that.
Fitting a strip that will work as a wedge to act as a
clamp is done using a scrap of oak then running it through the thickness sander
until it’s just fits. Packing tape gets
added along the inside face and bottom edge so the oak piece won’t get glued in
when the walnut is installed. With the
tape added final fitting is done on the oak until it and walnut fit snugly in
the groove. Too tight and the walnut at
the top of the groove might get split off.
Too loose may give a poor glue joint that looks bad and can result in
the gap the lid slides in being too narrow.
The top photo shows how the full assembly looks and the bottom is a
closeup of the left edge. If you look
closely, you can see the shine on the tape at the top left.
Once the glue dries the oak is removed revealing the
narrowed groove for the lid shown in the top photo. In testing the lid, it fits perfectly, not
too tight and not too loose. The glued
in walnut shim is still too tall and needs to be brought down flush with the
face of the side. That starts by using a
hand plane to get close shown in the bottom photo. What little is left will get cleaned up using
the thickness sander once the other side piece is done.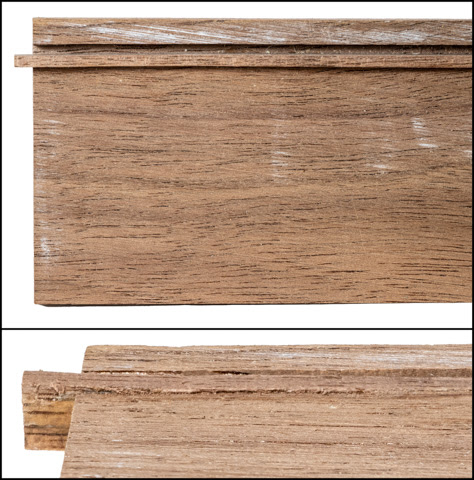
After changing the sandpaper in the thickness sander from
150 to 220 grit the sides go through the sander to bring the spacer flush with
the side and give me a finished sanded surface.
When the inside is done the outside gets run through also to give it a
finished sanded surface. If both sides
don’t look like they are the same width it’s because they haven’t been cut to
their final width, which comes next.
To size the width of the bottom the lid is inserted into the sides and the distance between the sides is measured. This gives me the bottoms width without any clearance for the lid to slide. Adding a fat 1/32 of an inch provides the needed side clearance. The recipient of this box lives in a humid climate and normally when building a project here in the desert the expansion due to humidity changes is something that I take into account. However, there are a couple of reasons this will not be a problem. First since the orientation of the grain in the box’s bottom and the lid are the same they will expand and contract together so there shouldn’t be a problem. The second is that because the box is small there won’t be that much change. If you are interested in how expansion and contraction is calculated read on. If not, you can skip the rest of this rest of this posting.

Next Up – Small Box Completion, Finishes Applied & Magnet Installation
No comments:
Post a Comment