Router Plane

Monday, May 26, 2025

Commissioned Gift – #6 Small Box Completion, Finishes Applied & Magnet Installation

 After cutting the sides and bottom to their final length plus 1/32” (for post gluing trimming) the glue gets applied to the bottom three quarters of the width of the joint.  It will be easy to clean the glue squeeze out off the bottom face of the box but not so easy on the inside so I want to limit squeeze out there.  A drop of glue is put on a scrap wood block and application is done with a toothpick.  
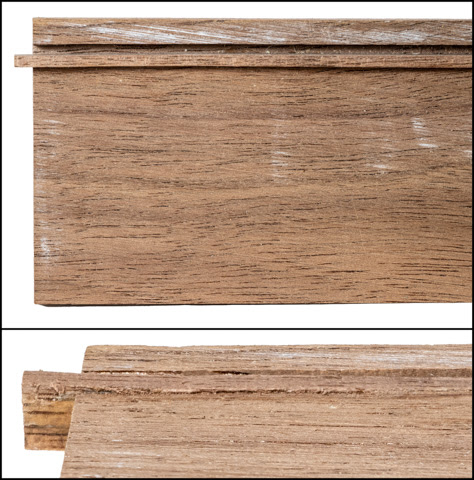
The white mark in the top center of the walnut bottom is my reference mark for piece registration.

Here's what the clamping for the glue-up looks like.  The reference mark gets matched up, the ends get checked to make sure they are flush with the side and the bottom is flush or just a tiny bit lower than the side.  That’s because it’s easier to make bring ¼” thick side flush versus working on the whole bottom’s width.  Spacers cut from scrap get inserted at the top of the box help keep the sides and bottom square.  A check with a square confirms that.  Once the glue cures overnight the other side will get glued on the same way.  I choose to glue the sides on one at a time to minimize the chance of getting something out of alignment during clamping. 

The next day the clamps are removed then the bottom and sides are checked to see if they are absolutely flush.  Not surprisingly they need just a light touch to bring them all flush.  With that done the ends can be cut and fitted so they are snug with a little clearance at the top to allow the lid to easily slide through.  Here’s what the clamping setup looks like for them.

After the glue cures the end panels are sanded flush with the sides as shown here.  While flush the grit on the disk sander leaves some circular scratches that will get sanded out after the edges are rounded.

Rounding the edges is done on the router table with a 1/8” radius bit.  Rounding the ends is done first because during routing the end grain of the sides can splinter when the bit exits the cut.  If it’s not too big then the flaw will get cut away when the long dimension is rounded over.  Since the ends are narrow a backer board is used to assure the box stays square with the fence while also providing additional support to the walnut edge when the bit exits the cut. 

This is what the box looks like with the edges rounded.  The router does a pretty good job except for the top four corners of the box.  The red arrows in the inset point to where two of them have been sanded round.  They weren’t routed as I was concerned that the tiny corner would get damaged during the process. 

After final sanding applying a finish to everything is next.  The Christmas ornaments get three coats of a wipe-on poly finish.  I didn’t spray them because I can’t get the spray gun inside the ornament and the inside shape is too complex to try and spray it from the outside.  Here are the completed ornaments.

Before spraying I was checking the refrigerator magnets and one of them just didn’t look quite right.  The top part of the walnut, maple and cherry one looked out of scale.  It bothered me enough that I put it back in the lathe and did more shaping until I was satisfied.  This is not the only one that got reworked.  The cherry and maple one started out with a raised top and the more I looked at it the uglier it got.  After expressing my concern and sharing photos, the client agreed whereupon it got a haircut.  Here are before and after photos of those two. 

The refrigerator magnets get sprayed with three coats of satin lacquer and are left to cure for a few days to let the finish harden before installing the magnets and their cups.  Those with sharp eyes may notice that the walnut and turquoise one is missing.  That’s because it had a small blemish in the lacquer that needed to be fixed.

The parts used to install the magnet are its mounting screw, cup and the magnet all shown at the top. The cup goes in first and is screwed in place followed by snapping the magnet in place.  Once the magnets are in, they are in to stay as it’s nearly impossible to get them out of the cup.

I had a little trouble getting the first magnet cup to fully seat in its hole so used a clamp and a small socket to press the cup in until its firmly seated.

With the magnets and their cups installed the refrigerator magnets are all done.  They do need to sit for a while to allow the lacquer to harden more before being used.

Because the box lid has a gloss finish the box will get sprayed with the gloss lacquer I used when building my Les Paul SG electric guitar back in 2012.  Here is a photo of it showing the finish.  Side note – I have built two guitars; an acoustic and this Les Paul electric.  One lesson learned is I should stick to building and not trying to play them. 

It has been a long time since I used gloss guitar lacquer and while it sprayed just fine it didn’t build quite as fast as the satin lacquer that I now use.  In order to get the box finish to match the lid finish it took about six coats.  When fitting the slot to the fit the lid I worked to make it not so tight the lid would bind or not so loose that it falls out.  In order to keep the slot’s same width after every other coat the slot required a little sanding to remove the lacquer buildup.  That’s done using a 6” steel rule along with some 320-grit sandpaper.

At this point the outside of the box is completed but the inside has one more step.  To create a nice luxurious interior all the inside surfaces get a black velvety coating.  Application is a multi-step process starting by masking off the adjacent surfaces to keep the adhesive off of them shown in the top photo.  The second step is applying a color matching adhesive to the areas.  That’s not shown because once the coating is in place the fibers need to be applied right away.  Applying the fibers is done using an air pump sprayer filled with the fibers that applies them evenly into the coating. 

When done the box and lid finishes match plus the lids slides just right.  Here are a couple photos of the completed box.

With all the various finishes applied everything is set aside to allow them to gas-off, cure and harden before shipping.  I am happy with the way all the different pieces turned out.  Even though I have made a lot of the refrigerator magnets additional ones always give me a chance to explore different options. Same with the Christmas ornaments so who knows I might try some more variations on them in the future.


Monday, May 19, 2025

Commissioned Gift – #5 Small Box, Part 1

The last piece in the commission is a small box with a sliding lid whose dimensions are 7 1/8” long by 2 1/8” wide by 1 7/8” deep.  While the walnut box is a relatively straight forward build it’s the lid that’s the main focal point.  It’s made from maple, walnut and cherry with about 90 different pieces.  When I made the lid about 13 years ago, I made seven of them but only two boxes, one cherry and the walnut one shown here.  Others have been sold or just kept in storage waiting to be used for something.  Now one is going to get a walnut box that looks like this and that’s what’s going to be covered here.  I will not be going through the top construction as that is a rather lengthy build and I don’t need any more of them.

Looking through my material to find the right size walnut is first.  I did find some walnut just a bit over the required ¼” thickness that will work out well.  Here the parts have been laid out showing where they are going to get cut from.

The 1/16” thick lid is going to slide in a 1/8” deep groove a little over 1/16” wide cut into the box’s sides.  Unfortunately, the smallest router bit I have cuts a groove 1/8” wide.  To get around this problem I will make a spacer slightly thinner than 1/16” then glue it into the routed groove leaving me a space for the lid just over 1/16” wide.  Here a piece of walnut just under 1/8” thick gets run through the thickness sander to bring it down to the thickness needed.  The insert shows a closer view of the starting piece at the top and the bottom piece (red arrow) being the thinned down filler strip.

My just cut filler strip is ½” wide and only 1/8” plus some is needed for fitting.  Because the piece is so thin and narrow there are few ways to rip it down.  Using the scroll saw with a fairly fine-toothed blade is a better option than hand sawing it with a coping saw or trying to cut it using a sharp knife and steel straight edge.

Next the groove gets cut using the router table and my 1/8” diameter router bit.  The top photo shows the setup and test cut made in a scrap piece.  To make sure that the groove gets made on the right side and along the correct edge the side pieces get marked up with chalk.  It’s not too critical here as I only want to make sure the best-looking grain and color are on the outside.  However, there are times when parts are handed and there is only one way they can be routed for the part to work.  Voice of experience on that.

Fitting a strip that will work as a wedge to act as a clamp is done using a scrap of oak then running it through the thickness sander until it’s just fits.  Packing tape gets added along the inside face and bottom edge so the oak piece won’t get glued in when the walnut is installed.  With the tape added final fitting is done on the oak until it and walnut fit snugly in the groove.  Too tight and the walnut at the top of the groove might get split off.  Too loose may give a poor glue joint that looks bad and can result in the gap the lid slides in being too narrow.  The top photo shows how the full assembly looks and the bottom is a closeup of the left edge.  If you look closely, you can see the shine on the tape at the top left.

Once the glue dries the oak is removed revealing the narrowed groove for the lid shown in the top photo.  In testing the lid, it fits perfectly, not too tight and not too loose.  The glued in walnut shim is still too tall and needs to be brought down flush with the face of the side.  That starts by using a hand plane to get close shown in the bottom photo.  What little is left will get cleaned up using the thickness sander once the other side piece is done.

After changing the sandpaper in the thickness sander from 150 to 220 grit the sides go through the sander to bring the spacer flush with the side and give me a finished sanded surface.  When the inside is done the outside gets run through also to give it a finished sanded surface.  If both sides don’t look like they are the same width it’s because they haven’t been cut to their final width, which comes next.

To size the width of the bottom the lid is inserted into the sides and the distance between the sides is measured.  This gives me the bottoms width without any clearance for the lid to slide.  Adding a fat 1/32 of an inch provides the needed side clearance.  The recipient of this box lives in a humid climate and normally when building a project here in the desert the expansion due to humidity changes is something that I take into account.  However, there are a couple of reasons this will not be a problem.  First since the orientation of the grain in the box’s bottom and the lid are the same they will expand and contract together so there shouldn’t be a problem.  The second is that because the box is small there won’t be that much change.  If you are interested in how expansion and contraction is calculated read on.  If not, you can skip the rest of this rest of this posting. 

The amount of expansion and contraction is based on type of wood, how it was cut, width of piece and difference in moisture content equilibrium of wood between winter and summer.  Since the piece is being made in the desert in New Mexico the lower humidity here will act as the base point.  Its new home is in a humid climate but will be in air-conditioned space with an assumed temperature of 70F which moderates the swing.  The difference between the low moisture content equilibrium here and the high point there is 8%.  Calculations are based using the piece width of 1.125 inches times plain sawn walnut expansion and contraction factor of .0027 equals .003 inches of change for each one percent moisture content equilibrium change.  The percent change is 8 so .003 times 8 equals .024 inches of change and if a safety factor is added in it would still be less than 3 hundredths of an inch between here in New Mexico and its new home.  Not enough to worry about.

Next Up – Small Box Completion, Finishes Applied & Magnet Installation


Monday, May 12, 2025

At the end of the last post a bark inclusion showed up right at the bottom of the turned part of the blank which was an unwelcome surprise.  The top photo shows a closer look at the problem.  There are four repair options that I considered:

  1. Ignore the flaw and go ahead with the project since this is going to be inside the ornament and not very visible.  This is an option but it’s not an acceptable level of craftsmanship.
  2. Fill the flaw with wood putty.  Going to pass on this since it would look like a cheap patch plus I am not sure how the putty will turn.  I also don’t know if the flaw might show up later on the outside. 
  3. Fill the flaw with black epoxy.  A viable option but I would like something that is more of a decorative feature versus just creating a black spot. 
  4. Fill the flaw with the turquoise/resin mix.  I will go with this as I like the little bit of color it will bring to the piece particularly if the flaw shows up on the outside as the turning progresses.  The bottom photo shows what this patch looks like.


Next step is to split the turning apart into its four pieces.  Before that though ¼” gets cut off each end shown by the red arrows and the red shaded areas.  Since the glue holding the pieces together was applied in a ¼” band cutting that amount off should help the splitting apart go easier.  The right photo shows the numbered quarters along with an arrow pointing toward the outside corner.  When reassembled that arrow will point toward the center of the blank.

On the left is two of the four pieces being glued together just like the prototype.  The right photo shows after gluing where you can see the arrows pointing toward the center.

Once glued back together the blank is mounted in the lathe so the outside can be turned.  The photo shows the 4-jaw chuck gripping the left end of the piece and a live center at the right end.  The chuck is used so I can part off the right side with the chuck still holding the piece in the lathe.  When I get to parting off the right end it should make more sense.

The two photos below show the in-progress turning to take the square blank to a round ornament. The blue areas indicate what’s left of the original flat faces of the square blank.  As the turning progresses that flat area will get less and eventually disappear.  The top photo is early on in the turning process and the bottom photo is much farther on which is why the blue areas are a lot smaller.

In the top photo the turning is done except for the ends of the ornament.  They are thicker than what the finished ends will be but have been left that way for strength.  The bottom photo shows the turning done on the right end with just the tiniest little bit holding the far-right part of the blank on.  The inset gives a closer view of that.  That end is cut off using a very fine saw.  With it gone the bottom of the ornament can be sanded smooth.  This is possible if the 4-jaw chuck is used rather than using a drive center like earlier since the chuck is still holding the ornament in place.  From here the left end is turned down to a thin end then cut off with the saw.  It’s then trimmed by hand with a sharp knife and finished sanded.

With the ends trimmed here is what the piece looks like in three different rotational views.  The individual ribs ended up pretty thin at only ¼” thick.  Overall, the piece is 5 ¾” tall and 2 ¼” in diameter weighing 1 3/8 ounces.  The blank before turning weighed 14 ounces so there was a lot of material turned into chips.

When the maple blank was made there was also one made out of cherry since I didn’t know if the turning process was going to work.  They are both the same length but the cherry is made from 1 1/8” square pieces while the maple was made from 1 ¼” square pieces.  The sequence for the cherry one is the same as the maple one except I decided to make a couple of design changes.  First, the initial turned area is symmetrical versus the maple’s asymmetrical turned shape.  To make sure the turned area is symmetrical I used a contour or profile gauge shown in the photo set so it matched the curve then flipped it 180 degrees and made turning adjustments as necessary until curves matched.  Second, while I liked the competed maple ornament, I thought that it could be made lighter looking with thinner ribs by cutting the initial turning a little deeper.  The down side is the thinner the ribs, the more fragile the piece gets.  The maple’s center turned diameter is just under ¾” so instead of stopping there I cut deeper stopping at just under 5/8” for the center diameter.

Now that does not sound like much but it made the remaining ribs a lot thinner and much, much narrower.  That meant with the piece mounted in the lathe and spun up to about 1,300 RPM’s the area in the center of the piece where the ribs are thinnest, narrowest and most fragile they almost completely disappear.  This made the turning more than a little nerve wracking since I couldn’t really see the surface I was working on.  The final shaping got done mostly by the sound and feel through the cutting tool.  I was also really concerned about the ribs strength and worried if I got a catch like with the prototype piece the result would be the same but more spectacular.  Fortunately, all went well and the ornament turned out fine with the ribs final thickness at only 1/8” thick.  Here’s three rotational views like the maple photos.

Making hangers is easy by wrapping a thin wire around a Phillips screwdriver then twisting the ends together.  It will be inserted into the small hole drilled at the top of the ornament and held in place with a little super glue. 

Next Up – Small Box, Part 1


Monday, May 5, 2025

Commissioned Gift – #3 Turned Magnet Blanks & Christmas Ornament Test

One of the walnut turning blanks almost got thrown in the burn pile.  The grain and color are nice but it had a knot surrounded on a couple sides with a gap and a bark inclusion.  However, with all its faults it looked like it could be made into an interesting piece.  I started by cleaning out all the loose bark and debris between the knot and the body of the blank.  Second, using thin super glue the joint is soaked to lock the knot in place.  That’s been done in the left photo.  From there the gaps are filled with the turquoise/resin mix.  Turning is done the same as the other pieces with the final result shown in the right photo.

The other blanks are turned to various different shapes following the same basic process as previously described.  When done I had accumulated eleven different refrigerator magnet bodies shown below ready to be sprayed with lacquer.

The lathe turned Christmas ornament is next.  It starts out with four pieces the same width and thickness.  Length is determined by taking estimated overall length of ornament and adding about 4”.  Below are the four pieces of cherry I will use as a prototype or “proof of concept” trial.

Gluing the pieces together with all edges flush or at least having the center point where all four pieces meet perfectly aligned is critical.  I’ll go into detail as to why that’s important later.  The turning process for making the ornament requires this glued blank to be turned then split into the original four pieces.  To make the splitting apart process easier only a ¼” wide band at each end will get glued to hold them together for the initial turning.  After applying the ¼” wide glue band at the ends the four pieces are end clamped with the grey clamp to keep them flush.  The blue clamp provides downward pressure to keep the top and bottom joints flush.  All of this has been done in the top photo.  The bottom left photo shows the blue clamp removed and replaced with two clamps to provide even top to bottom clamping pressure.  Last in the bottom right photo the end clamp is removed and two orange clamps are added to provide side to side clamping pressure.

Turning what will be the inside of the ornament is next.  The top photo shows the blank mounted in the lathe and ready to go.  The bottom photo shows the completed turning sanded and ready for the next step.

To split the blank into its four quarters a chisel and wood mallet are used.  

Here the top photo shows one of the split quarters.  In it you can see where the piece was just glued at each end.  The red circles are areas when the joint was split some wood from the adjacent piece stuck to this piece.  Because the four pieces will be glued back together the faces have to be flat so these projections need to be removed.  That’s accomplished by using a wood chisel to remove most of the material then clamping a piece of sandpaper to a flat surface and sanding the faces flat.

The pieces get glued back together with each of the pieces turned 180 degrees from where they were originally.  This means the turned surface that was facing out now faces in.  The chalk marked faces in the top photo show where the glue gets applied.  The two below show what they will look like when glued up.  The bottom photo shows the four quarters glued up into two halves.

Once the halves glue is cured the two of them can be glued together to make the turning blank.  When the glue cures the point where all four pieces come together is marked.   Using that point for mounting is critical because if it’s off the four outside faces will not be the same.  From there the blank is put on the lathe as shown in the top photo.   The actual turning went well for a while with the center part starting to emerge but then at the top I had a catch that broke the turning into the two pieces shown.  Not exactly what I had envisioned when starting the turning but I did get some valuable information on the design and what to change next time to improve my chances of success.

Armed with what I learned in testing it was time to do a little 3D modeling to work out in detail how altering both the pieces dimensions and initial outside turning proportions impacted things.  What started out to as a simple 3D design very soon snowballed into a real head scratcher that ate up about 10 hours of work spread over three days.  It turns out that working with multiple curved intersecting surface taxes both the computer program as well as my brain.  The top drawing shows some of the failed layouts and dead ends with the bottom drawing showing me enough detail I could proceed with a second attempt.

The second attempt starts with a larger turning blank made from maple.  Where each of the four, square segments in the first attempt were about ¾” square and 6” long the new blank’s pieces are 1 ¼” square and 8 ¾” long.  The cutting and assembly of the four-piece blank follows the same process as the test piece except that instead of gluing all four pieces together at once to form the turning blank I did it in two steps.  First is to glue up two sets of quarter pieces to form two halves then glue those together to make the blank.  Here in the top photo is the blank with the center turned.  The big difference here is the depth of the cut.  The thinnest part of the of the turning is a just under ¾” thick which is proportionally quite a bit deeper than the failed prototype.  Everything went well until the turning uncovered a nasty little surprise deep in the blank shown in the bottom photo.  There is a bark inclusion that I think runs most of the length through the blank even though it did not show up at all when making the blank and is something I will have to deal with.

Next Up – Turning the Christmas Ornaments