|
| Test Piece Joint Gap |
The fix for a smooth transition is to stop the larger diameter bit short of the interior corner. For the top .06” did the trick and on the bottom .04” worked. For a thickness gauge I used playing cards which are right at .01” thick each so a stack of 4 or 6 cards taped in place did the trick. I also darkened in the initial corner radius cut with a pencil so I could gauge how the stopped cut worked for the transition. This photo shows the pencil mark cut away in a smooth curve. It also shows all the notes I made to myself on the piece so I use the right bits and spacers in the right places. I am a great believer in writing on pieces to assure correct cuts.
 |
| Using Playing Cards as Spacers |
At this point in the mock-up I glued the seat together. However, this time I decided to rearrange the
sequence to fit the rear legs to the rear leg joints prior to glue up. I did this so if any hand work is needed I
would not be working with the whole seat.
Also, if adjustment with a router is needed I could not do that once the
seat pieces are glued together. The rear legs and arms just happen to be cut from the same
piece so the first step is to cut the legs out with the bandsaw.
 |
| Bandsawn Rear Legs |
 |
| Jig to Cut Rear Leg to Seat Reference Plane |
More marking on each rear leg since they will be a mirrored
set and I did not want to end up with two left legs!

The front legs are square to the seat so they are the same, that is no left and right. I cut two square blanks to the length, width and thickness needed setting them aside for later.
The front legs are square to the seat so they are the same, that is no left and right. I cut two square blanks to the length, width and thickness needed setting them aside for later.
 |
| Measuring Seat Tenon Thickness |
With the mirrored legs and angled mortise I could not make the cut in multiple passes so I had to assemble a stack of dados to match my desired .88" cut width. Here is what I used to make the cut: the left and right 1/8” outside blades, four 1/8” chippers, one 3/32” chipper and two .02” shims. My test cut came out at .879”, close enough.
 |
| Dado Blades Used to Cut Seat Joints in Legs |
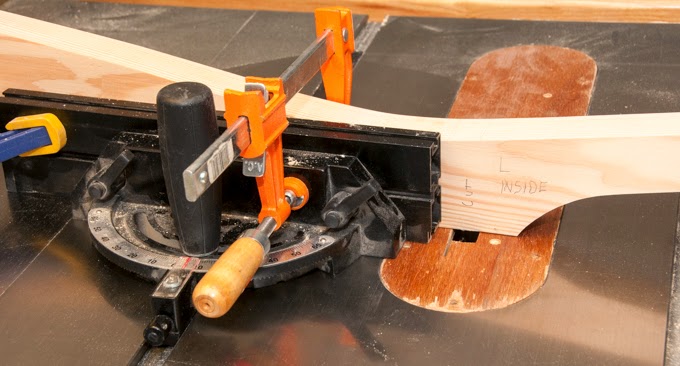
One of the dados is at 5 degrees to match the tenon and the
other is square with the mounting face.
I used the 5 degree jig to set the fence, one setup for left and another
for the right leg. For the square tenon
I had to use a jig that held the mounting face square with the dado blade
because the leg is curved.
 |
| Table Saw Setup to Cut a Dado |
A run through the router table using a ½” radius bit matches
the legs to the 1” diameter router cuts on the seat, well almost. Because of that pesky 5 degree angle the leg
does not exactly fit into the radiused corner of the rear seat joint. This is where I get into some hand
fitting. I could see the gap but because
it was inside the joint could not see where to remove material. To find where the high spots are I use a soft
pencil to mark up the inside of the joint then clamped the leg in place. When I took it apart the high spots on the
seat left pencil lead on the leg.
 |
| Pencil Mark on Top Piece Shows High Point to Trim |
Now all I had to do was match the lead on the leg to where
it came from on the seat, trim the joint and repeat until the leg and seat fit.

The front leg blanks are next and for now just get a dado
cut on three sides and a radius routed on the two interior corners.
 Finally everything is ready to glue up the seat! Seat pieces, yep – dowels, yep – glue, yep –
mallet, yep – clamps, yep – plastic so I don’t get glue all over the workbench,
yep.
Finally everything is ready to glue up the seat! Seat pieces, yep – dowels, yep – glue, yep –
mallet, yep – clamps, yep – plastic so I don’t get glue all over the workbench,
yep.
Ten minutes later it’s all glued together and set aside
until tomorrow.

Yes, I did check to see if the outside pieces were flat and
they were.

Next Up – The Real Seat: Bandsaw and Hollowing